Concept
Here are the main basic concepts of Jeedom. This documentation is intentionally kept simple to help you get started with your home automation system.
Jeedom’s possibilities are virtually endless, since you can create a wide variety of things using a few PHP, Python, or other scripts, but that’s not the topic here.
Display
Jeedom allows you to integrate a wide variety of devices, whether they use protocols such as Z-Wave, Enocean, Zigbee, etc., via APIs using plugins, or directly through scripts. You can check out the Market to see a list of supported devices.
You can view these devices in several ways:
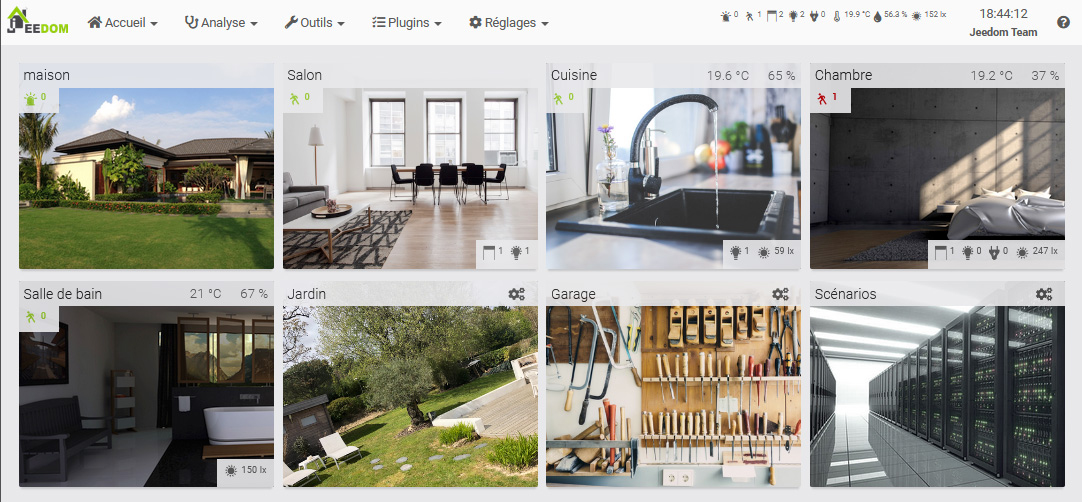
These can be viewed in a browser on a desktop computer, on a smartphone using the WebApp, or via the mobile app: Mobile Version
Objects
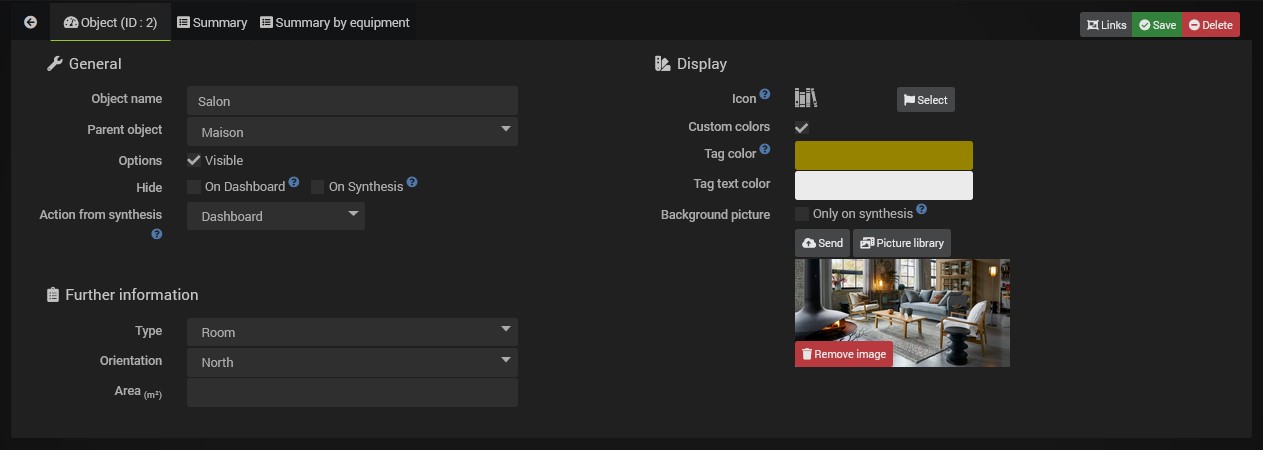
To organize your devices, you can create Objects.
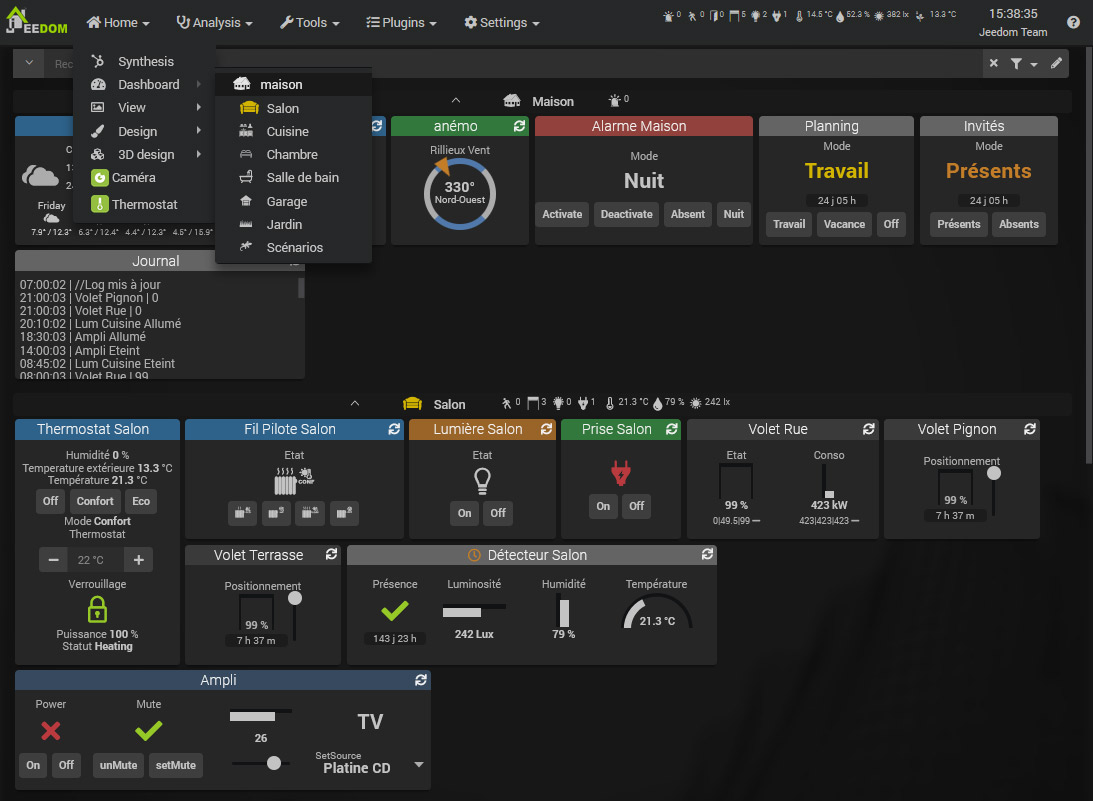
These objects can represent rooms in the home (Living Room, Bedroom, Workshop). Each object can have a parent object. This hierarchy will be used for display on the Dashboard. For example, you can have a House object, and then Living Room and Bedroom objects as children of the House object. Once on the Dashboard, the House object will also display its child objects below it.
Tip
In Settings → Preferences, you can choose which object you want to land on when you open the Dashboard. Preferences
Devices and Their Commands
Commands
To interact with our home automation system, you need commands! There are two types of commands:
Note
Don’t worry—commands are normally created automatically! These explanations are provided to help you understand better.
- The info commands: These commands store information from sensors. For example, the temperature from a sensor, movement detected by a motion sensor, etc. These commands can be logged to preserve this information over time in the form of a graph: History
These commands can also be used to trigger scenarios to automate actions based on information reported by your sensors. For example, a motion sensor detects someone’s presence, which triggers a scenario that turns on the light.
- Action commands:
These commands allow you to control your actuators. For example, the commands
onandoffwith a smart plug will allow you to turn it on and off.
Action commands are generally linked to info commands. Here, our outlet has two actions on and off, generally related to Status information.
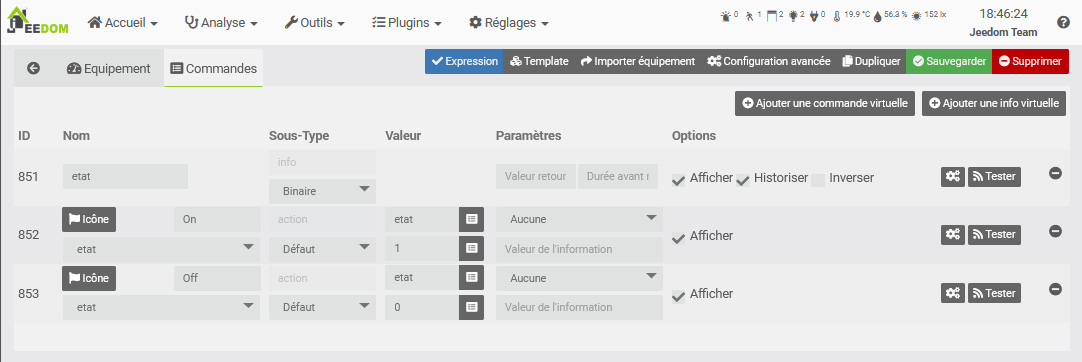
These two types of commands are grouped together as a single piece of equipment. The equipment therefore has info and/or action commands, and this equipment will have an Object as its parent, allowing you to display it wherever you want.
Each command can also have what is called a generic type, allowing Jeedom and certain plugins to identify the type of command (outlet status, light switch, etc.). Tools → Equipment Types.
Equipment
- Hardware: I have a power outlet with an on/off switch and a status LED in the living room.
- In Jeedom: I have a device with two actions (on and off) and a status update in the Living Room object.
These devices are created using plugins. For example, the Z-Wave plugin will allow you to add your Z-Wave outlet, which will create a device with its own commands that you can name and link to an Object.
In terms of display, each command is shown using a widget. The Core provides the main widgets, as well as a tool for creating them (V4): Widgets.
These commands are grouped into a tile corresponding to your device. This tile will then be displayed on the Dashboard under the object you have assigned to it.
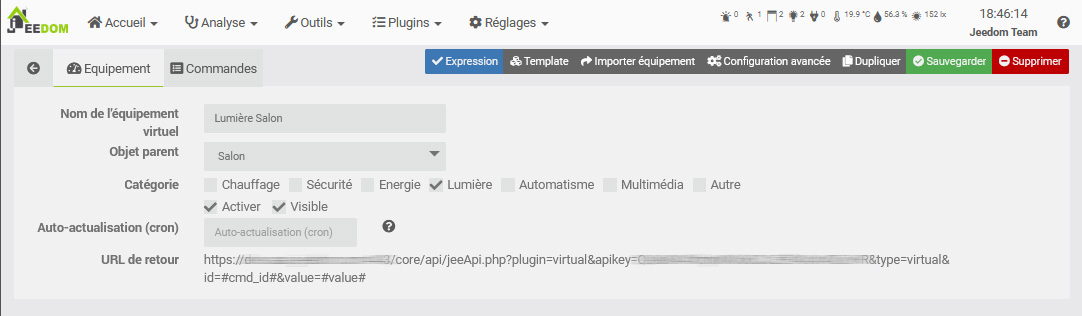
Regardless of your device, it will be created as a piece of equipment based on a Plugin.
This device will have its own info or action commands. These commands will be displayed as widgets that make up the device’s tile within its parent object.
You’ll then see that each Object, Device, or command has numerous options in terms of functionality and display. But one thing at a time—by now you should have a grasp of Jeedom’s basic concepts and be able to start setting up your home automation system, knowing where to look.
My First Scenario
The appeal of home automation, beyond the centralized and remote control of our devices, lies primarily in automation. The goal isn’t to spend hours in front of your dashboard or interface, but rather for your home to adapt to your habits and run seamlessly in the background. No more opening and closing shutters every day, no more turning lights on and off; you’ll be notified when to put the trash out, when there’s mail in the mailbox, and the heating will adjust according to the seasons and weather conditions. The possibilities are endless and depend on each person’s mode of life. That’s what scenarios are for!
A scenario is a sequence of defined actions that will run at specific times of the day. Execution can be scheduled (every Monday at a certain time) or triggered by an event. As shown above, this event could be, for example, the Presence command from a motion detector following a detection.
The goal here is not to be exhaustive, but to explore different scenarios through simple examples. The user manual documentation is much more comprehensive.
Turns on the light when motion is detected.
Let’s say we have a smart light and a motion sensor in the bedroom.
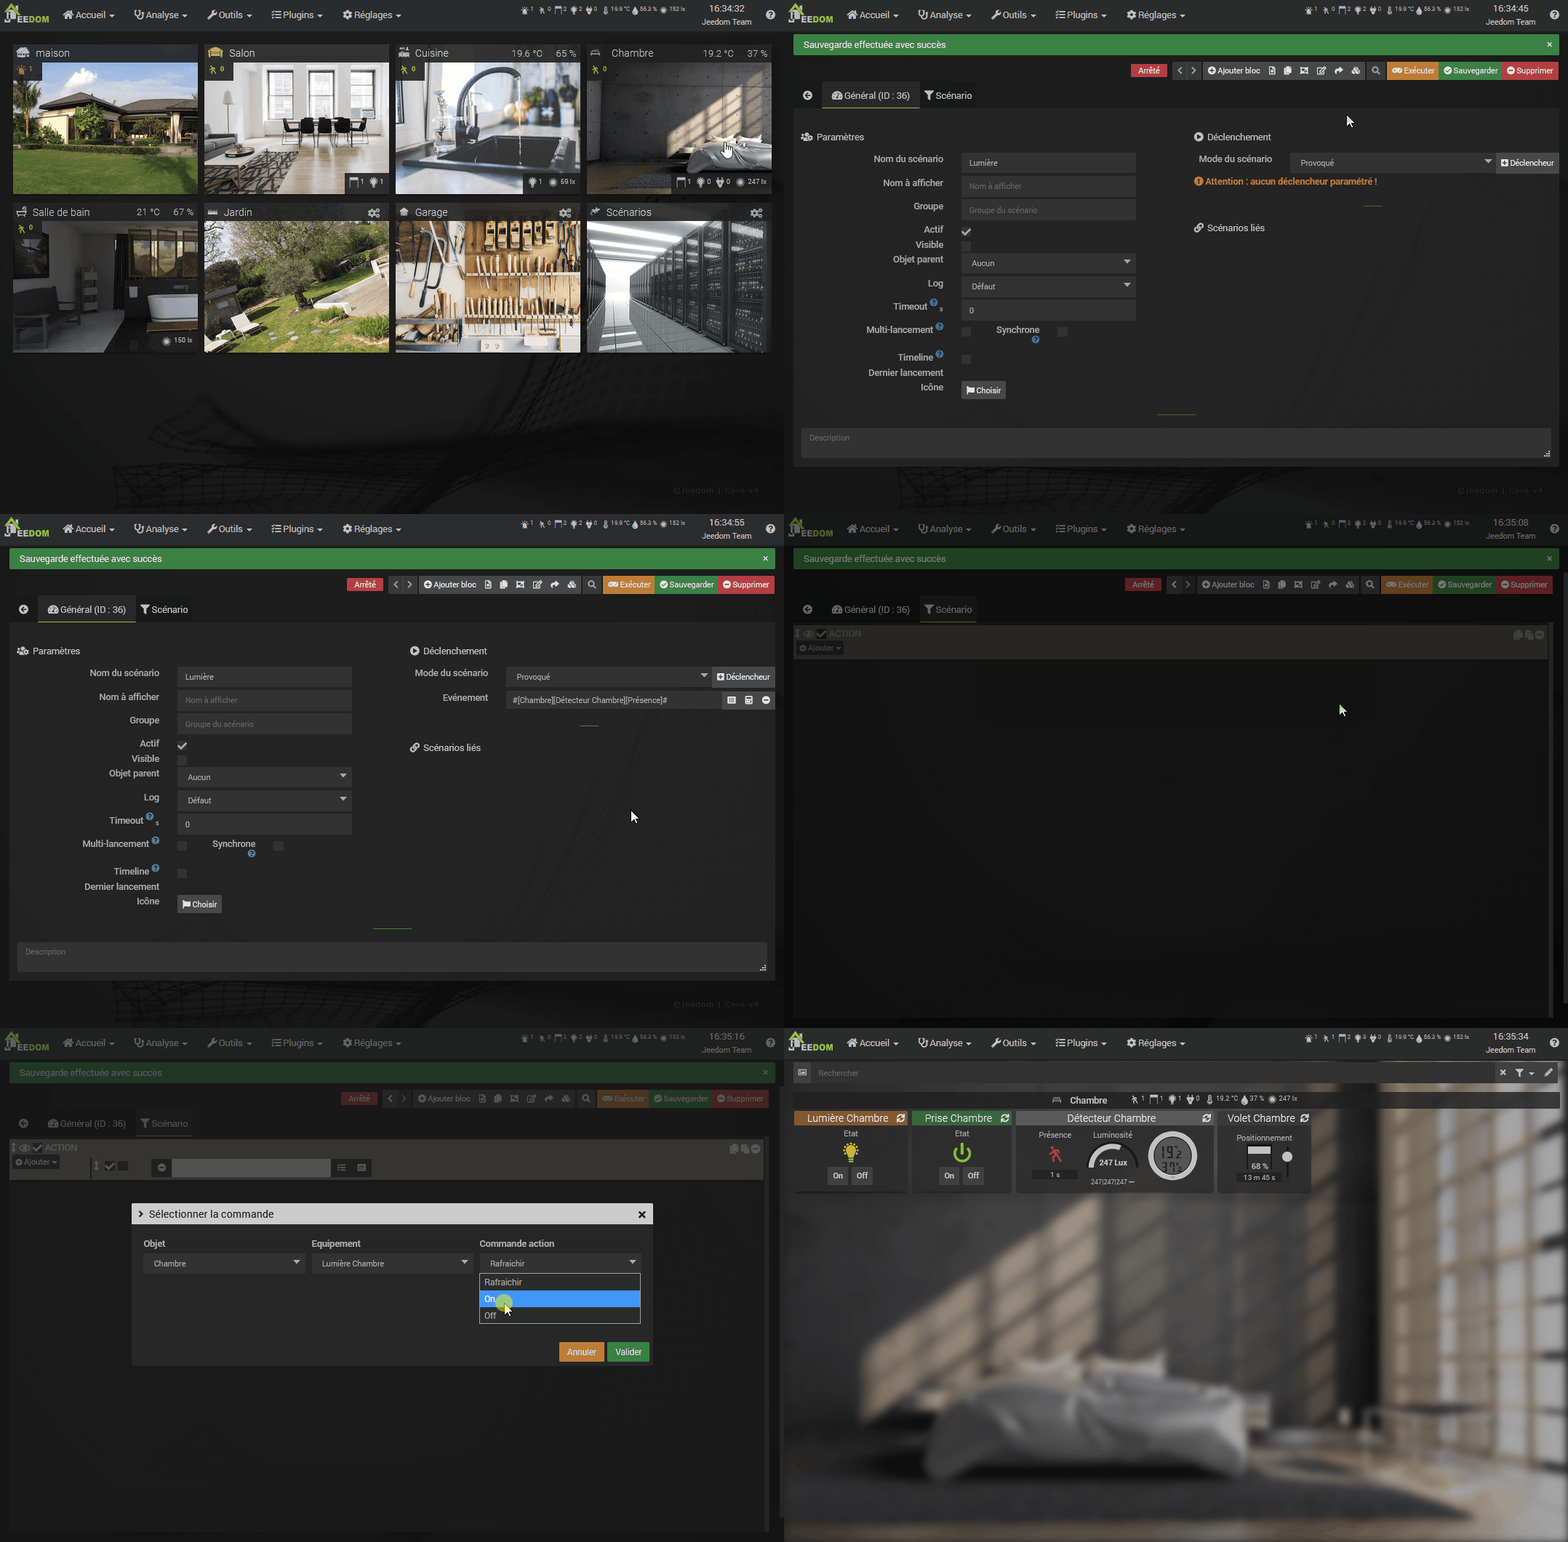
- Go to Tools → Scenarios
- Click Add, then give the new scenario a name.
- On the right, in the Trigger section, make sure the mode is set to Triggered, then click + Trigger.
- Using the Select a Command button to the right of the Event field, select the object, then the device, and finally its command.
The Trigger is what will trigger the execution of this scenario. Here, we want to trigger it when our sensor detects a presence, so we’ll use the command #[Chambre][Détecteur Chambre][Présence]# == 1.
The # specify a command, followed by [the name of its parent object], then [the name of the device], and finally [the name of the command]. Here, we add ` == 1` because we want the scenario to trigger only when a presence is detected. However, with a presence detector, the detection resets to 0 a few seconds later. This reset to 0 will therefore not trigger our scenario again.
-
Click the Scenario tab, then click the Add Block button at the top. Select an Action block, then Add an Action to it. This action will be our command to turn on the light. Following the same principle:
#[Chambre][Lumière Chambre][On]#. -
Save, and your scenario is ready!
Here, we’ve only scratched the surface of what’s possible with scenarios. You can add conditions (If/Then/Else block), delay actions (In block), schedule them (A block), and even use PHP code directly (Code block).
Here, we used the manual trigger mode with a command. But you can also use (and combine) the scheduled mode to run a scenario every morning or every hour, etc.
Today’s schedule.
A common topic for Jeedom beginners is programming daily events such as:
- Turn on the coffee maker at 7 a.m. on weekdays.
- Open the shutters at sunrise.
- Close the shutters at sunset if I’m not home.
For this type of scenario, here is a very good introduction: Today’s Schedule