Edisio
Plugin to use the Edisio protocol with Jeedom
Configuration
The edisio plugin allows you to communicate with all the peripherals compatible with the edisio USB module.
Plugin configuration
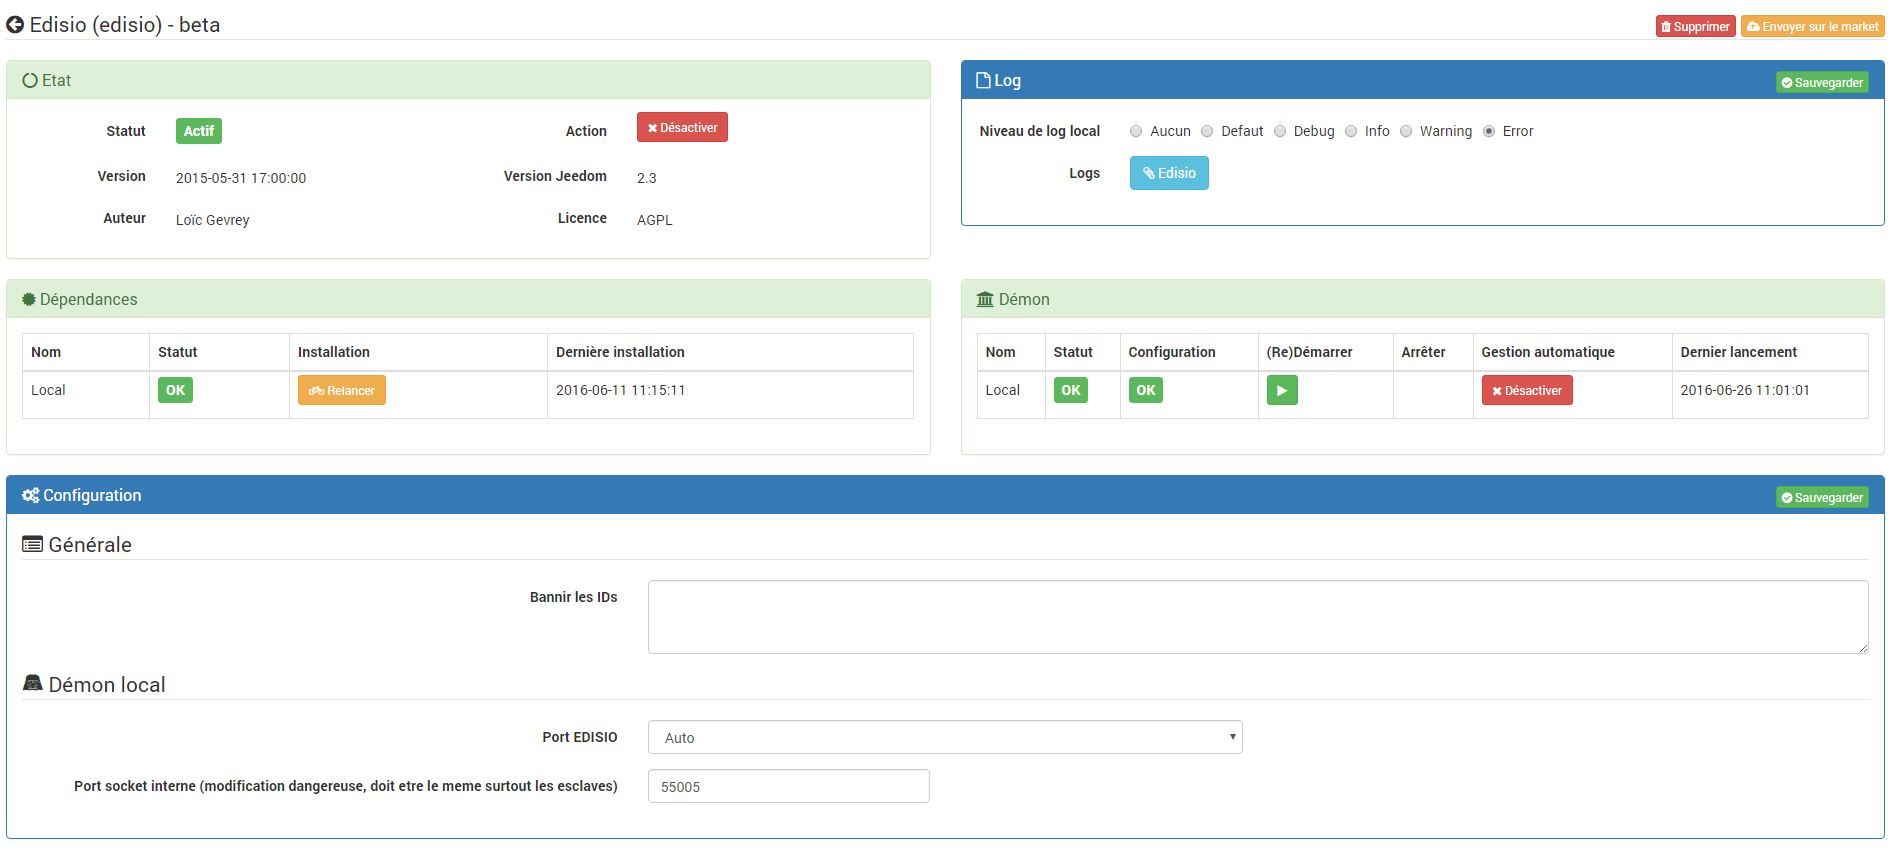
After downloading the plugin, you just need to activate it and set the port to auto. After saving the demon should launch. The plugin is already configured by default; you don’t have to do anything more. However you can modify this configuration. Here is the detail (some parameters may only be visible in expert mode) :
- Dependencies : this part gives you the status of the dependencies, if they are not OK you can either launch them by hand or wait 5 min, Jeedom will launch them by itself.
- Daemon : this part gives you the status of the demon (both local and remote), if it is not OK you can either launch it by hand or wait 5 min, Jeedom will launch it by itself.
- Setup : This part allows you to configure the general parameters of the plugin.
- Ban the following IDs : allows to give a list of edisio identifiers to Jeedom so that it does not create the corresponding equipment. Identifiers must be separated by spaces. Example : “1356AD87 DB54AF”.
- Local demon : local configuration parameters (or remote, depending on the title) of the daemon.
- Edisio port : the USB port on which your edisio interface is connected.
Tip
If you do not know which USB port is used, you can simply indicate “Auto”.
- Internal socket port (dangerous modification, must be the same value on all edisio deported Jeedoms) : allows to modify the internal communication port of the daemon.
- Edisio port : the USB port on which your edisio interface is connected.
Important
Change only if you know what you are doing.
To launch the daemon in debug it is enough at the level of the configuration of the logs of the plugin to put in debug, to save and to restart the daemon.
Important
In this mode, the demon is very talkative. Once the debug is finished, don’t forget to click on “Restart” to exit the debug mode !!
Equipment configuration
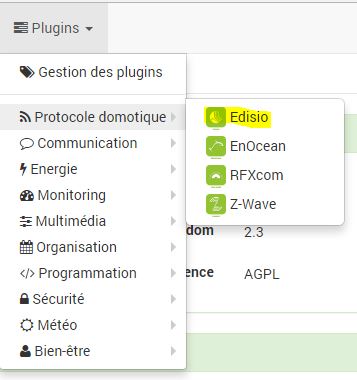
The configuration of edisio equipment is accessible from the plugin menu :
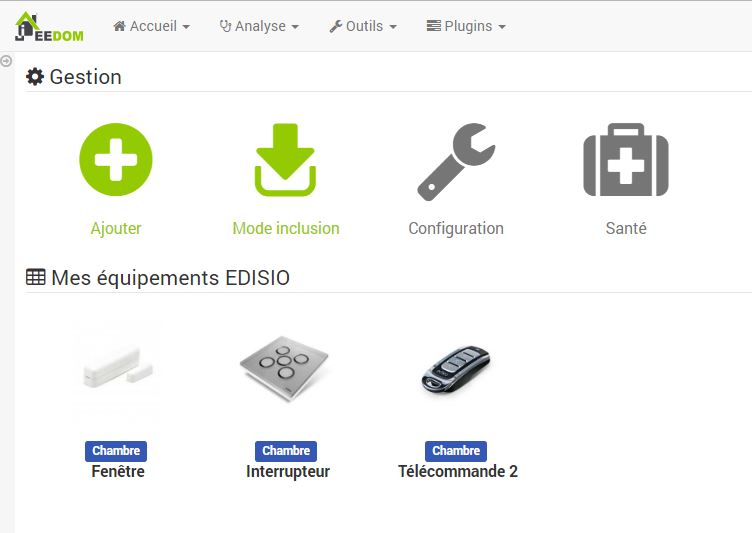
This is what the edisio plugin page looks like (here with already 4 devices) :
Tip
As in many places on Jeedom, putting the mouse to the far left brings up a quick access menu (you can from your profiles always leave it visible)
You will find here :
- a button to manually create an equipment
- a button to switch to inclusion
- a button to display the configuration of the plugin
- a button that gives you the health status of all your Edisio equipment
- finally below you find the list of your equipment
Once you click on one of them, you get :
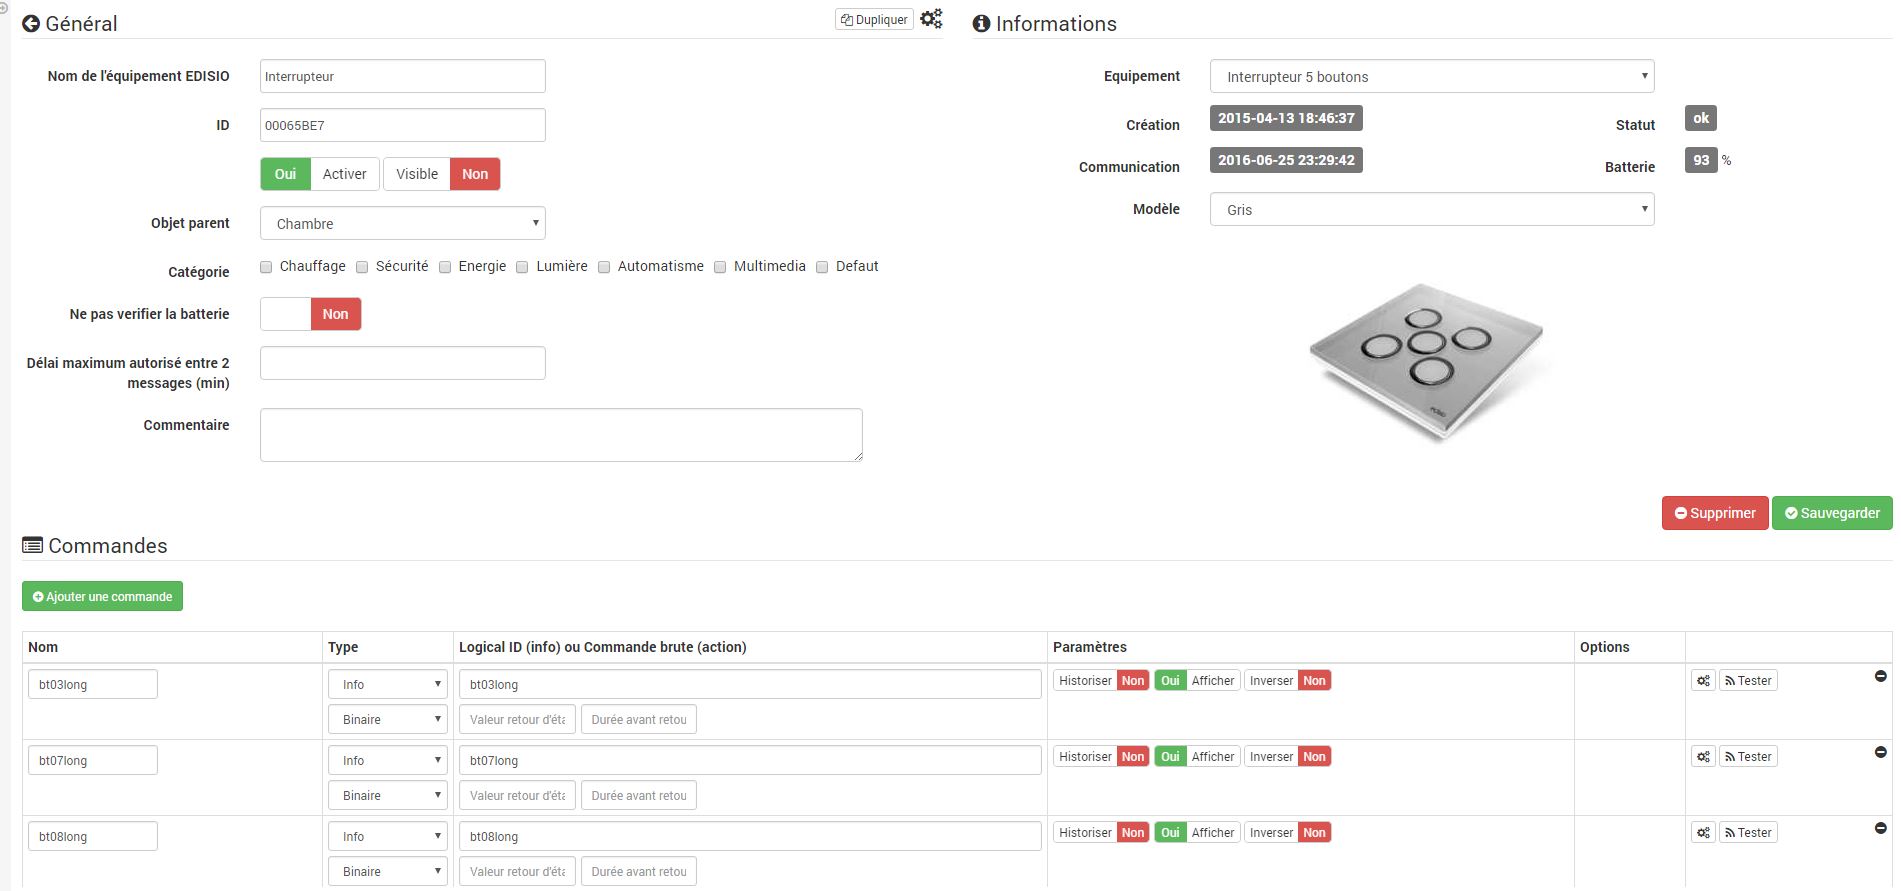
Here you find all the configuration of your equipment :
- Edisio device name : name of your edisio equipment
- ID : the ID of your probe (to be changed only with full knowledge of the facts))
- Activate : makes your equipment active
- Visible : makes it visible on the dashboard
- Parent object : indicates the parent object to which the equipment belongs
- Category : equipment categories (it can belong to several categories)
- Do not check battery : tells Jeedom not to alert you if the equipment sends a low battery frame (some modules do not handle this info correctly and generate false alerts)
- Maximum time allowed between 2 messages (min) : the maximum time allowed between 2 messages before Jeedom declares the equipment as a timeout”. Attention this parameter requires having configured the option “Force the repetition of messages every (min)” and it must be greater than this value
- Comment : allows you to put comments on the equipment (ex : battery changed on XX / XX /XXXX)
- Equipment : allows you to define the model of your equipment (to be configured only for manual creation of equipment, in automatic Jeedom configures this field alone)
- Creation : gives you the date of creation of the equipment
- Communication : gives you the date of last communication with the equipment (can be empty in the case of a socket for example)
- Drums : equipment battery level
- Status : equipment status (can be timeout for example)
Below you find the list of orders :
- the name displayed on the dashboard
- type and subtype
- the information key if it is an info, or the hexadecimal code to send when it is an action. The configurations allow these fields to be filled in automatically (you have to create the equipment, choose the configuration then save)
- “Status feedback value “and” Duration before status feedback” : allows to indicate to Jeedom that after a change on the information its value must return to Y, X min after the change. Example : in the case of a presence detector which emits only during a presence detection, it is useful to set for example 0 in value and 4 in duration, so that 4 min after a detection of movement (and s’ there has been no news since) Jeedom resets the value of the information to 0 (no more movement detected)
- Historize : allows to historize the data
- Show : allows to display the data on the dashboard
- Event : in the case of edisio this box must always be checked because you cannot query an edisio module
- Unit : data unit (can be empty)
- min / max : data bounds (may be empty)
- Advanced configuration (small notched wheels) : displays the advanced configuration of the command (logging method, widget, etc.))
- Test : Used to test the command
- Delete (sign -) : allows to delete the command
Operation on edisio equipment
At the top of your equipment configuration page, you have 3 buttons that allow you to perform certain options :
- Duplicate : duplicates equipment
- configure (small toothed wheels) : same principle as for the commands, it allows an advanced configuration of the equipment
Inclusion of edisio equipment
Adding Edisio equipment is very simple, you just have to go into inclusion mode and wait for the equipment to send a message, when that is the case Jeedom will tell you that it has included new equipment and will create it automatically.
List of compatible modules
You will find the list of compatible modules here


