Data Export plugin
Plugin allowing to generate and manage the archiving of historical exports of the orders of your choice to a * .csv file.
The plugin offers the possibility of exporting the raw values of each order over the selected period or the statistics thereof : mean, min., max., sum, standard deviation, number of values, last value.
It is possible to recover the export file in several ways :
- Direct download on demand,
- By sending on the channel of your choice via programming,
- By sending on the channel of your choice via a scenario.
An import tool is also included in order to be able to integrate values into the history of a Jeedom order.
Configuration
Plugin configuration
The plugin Data Export does not require any specific configuration and should only be activated after installation.
Equipment configuration
To manage your different export batches, go to the menu Plugins → Organization → Data Export and click on the equipment you want to configure.
INFORMATION
The button + Add allows you to create a new export batch.
You can give a name to the export batch, assign it a parent object (useful to identify the export send command in a scenario) and activate or deactivate it.
Check the box Statistics allows you to opt for an export of statistics (mean, min., max., sum, standard deviation, variance, number of values, last value) instead of raw values.
Choose the periodicity of the export

Choose the period for which the history must be retrieved among the possibilities offered :
- Days : the selection will be made on the “X” last days (minimum:1/maximum:999).
- Period : Select a predefined period (Current week, Previous week, Current month, Previous month, Current year, Previous year, etc…).
- Dates : Manually fill in the start and end dates of the selection.
TRICK
If the end date is not entered, it will be the current day by default.
Choose the orders to export
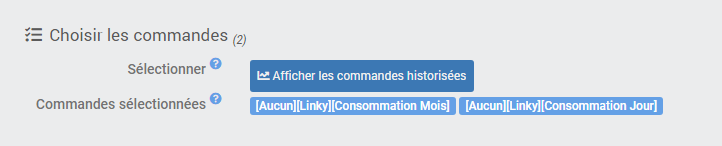
Then select the orders for which you want to obtain the histories by clicking on the blue button Display historical orders.
A window opens and displays the list of orders logged with a selection box to be checked at the start of the line. Each column can be filtered or sorted, the button Reverse allows the inversion of the current selection and the green button Validate saves the current selection.
Below the command selector button is the list of currently selected commands.
TRICK
Clicking on the name of an order opens the configuration page of the order concerned.
Archiving export files
To access the archived exports, go to the tab Archiving equipment.
Field Retention allows you to indicate the number of export files to keep in archives (minimum:1/maximum:99).
Below the part Navigation displays the list of currently archived export files. Select one of the files to view file preview (limited to the first 1000 lines) and activate the download and delete file buttons.
Export data
Download on demand
Once the period and the orders have been chosen, save the equipment then click on the blue button CSV export to generate a new export corresponding to the requested criteria.
At the end of the process, the new file will be automatically added to the list of exports on the tab Archiving. Click on the file name to select it then on the green button Download to download it immediately via your browser.
Send via programming
It is possible to send the export file on the channel of your choice (Mail, Telegram, Discord, etc…) via programming directly configured on the equipment page.
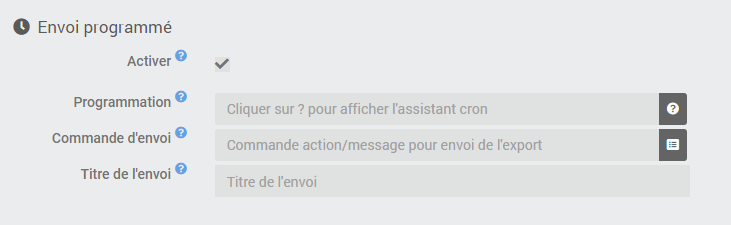
To activate the schedule, check the box Activate of the section Scheduled sending.
3 new fields then appear :
- Programming : indicate the programming by a cron.
TRICK
Click on the question mark at the end of the line to access the cron-wizard to easily configure the schedule.
- Send order : select the Action / Message command allowing sending on the chosen channel (facultatif).
INFORMATION
If no send command is selected, the export file will still be generated and archived.
- Shipment title : Fill in the title to be affixed to this shipment (facultatif).
TRICK
It is possible to use scenario tags in the title of the shipment.
Send via scenario
You can also send the export file to the channel of your choice (Mail, Telegram, Discord, etc…) via a scenario.

You must then select the command Send CSV Export corresponding to the desired export batch in a block Action of a scenario. Fill in the Title (facultatif) as well as Action / Message command to send the export on the desired channel (facultatif).
TRICK
As for sending by programming, it is possible to use scenario tags in the sending title and the file will be automatically archived by the plugin if no sending command is entered.
Import data
If you want to integrate data into the history of a Jeedom order, you can use this tool. To do so, you must send a spreadsheet file with the extension csv with semicolon separators containing a column of values to integrate and a column of corresponding time stamps.
Beware of timestamps which can be interpreted and modified depending on the spreadsheet application you are using. For example, Excel tends to remove seconds automatically and format the date in French format by default. In this case, you will need to indicate a custom format such as dd / mm / yyyy hh:mm:ss or yyyy-mm-dd hh:mm:ss for cells containing a timestamp.
IMPORTANT
Importing data into Jeedom is not trivial and must be done knowingly. It is always advisable to carry out a preliminary backup of Jeedom before any intervention of this type.
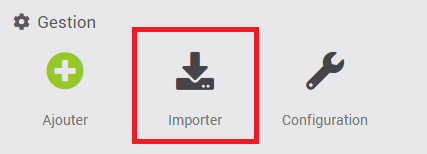
To access the value import tool, go to the general page of the plugin then click on the button Import.
The import window is used to integrate values in the history of an Info type order from a file *.csv provided that :
- The file contains a column named “Date”,
- The file contains a column named “Value”,
- The column separator is a semicolon,
- The date format is correctly entered (French | international).
Send data
Click on the button to select a CSV file. Once loaded, the file is verified and important information is displayed on the screen :
- Name and size of the file,
- Number of lines treat,
- Period concerned by the import,
- Dates and values to import.
Receive data
Then click on the button to select the command intended to receive the values. Information such as subtype and unit will then be displayed on the screen.
If a history already exists on the order for the period concerned by the import, its content will also be displayed.
Process existing data
If there is a history on the order during the phase concerned by the import, the tool will ask you how you want to manage this data.
3 choices are possible :
- Keep all data already present in history,
- Replace only duplicate values between the csv file and the history,
- Overwrite all data in history over the period.
Start import
Once the file containing the data to be imported has been integrated and verified by Jeedom, the data reception command has been entered and your choice has been made concerning the processing of the history, you can click on the button Import file to initiate the procedure.