#
Introduction
:
- …)
- )
”. .
##
. ..
. .
:
###
. . . …
.
###
. .). .
()
. .
()
. .
). .
()
. ). .
. .
.
()
. . .
- ###
-
.
.:
python “
’ ‘ ‘ = ‘’ = ‘’
: =”): (“=”) =”): (“=”) =”): (“=”) =”): (“=”) =”): (“=”) =”): (“=”)
)
)
- ’)
- ’))
- ’))
- ’))
- ’))
- ’))
- ’))
) )
try: )) ) (): . .’) shutdown() ) listen() : : ‘)) shutdown()
:
python
. .
’ # emplacement par défaut du pidfile, ce fichier est utiliser par Jeedom pour savoir si votre démon est démarrer ou pas; nom du démon à modifier comme expliqué ci-dessus;
= ‘’ ## )
: . ). .
. .
python : =”): (“=”) =”): (“=”) =”): (“=”) =”): (“=”) =”): (“=”) =”): (“=”)
:
python ) )
:
python ): )) shutdown()
:
python (): “) )) try: ) except: pass try: () except: pass try: () except: pass “) () )
.
..
:
python try:
(): #
    . .')
    shutdown()
: : ‘)) shutdown()
:
python (): () try: : ) () : shutdown()
python ():
():
    ")
    ()))
    '] != _apikey:
         : " ))
        return
    try:
        '
    :
         : '))
.
:
python try: ‘ : : ‘))
.
).
##
.
###
.:
json { “id” : “pluginID”, “name” : “pluginName”, … “hasDependency” : true, “hasOwnDeamon” : true, “maxDependancyInstallTime” : 10, … }
.
###
.
()
:

. .
php () { $ = array(); $return[‘log’] = CLASS; $return[‘state’] = ‘nok’; $pid_file = jeedom::) . ‘/deamon.pid’; )) { )))) { $return[‘state’] = ‘ok’; } { ::getCmdSudo() . ‘ ‘ . $pid_file . ‘ } } $return[‘launchable’] = ‘ok’; $user = config::byKey(‘user’, CLASS); // exemple si votre démon à besoin de la config user, $pswd = config::byKey(‘password’, CLASS); // password, $clientId = config::byKey(‘clientId’, CLASS); // et clientId == ‘’) { $return[‘launchable’] = ‘nok’; $return[‘launchable_message’] = (‘Le nom d'utilisateur n'est pas configuré’, __FILE); } == ‘’) { $return[‘launchable’] = ‘nok’; $return[‘launchable_message’] = (‘Le mot de passe n'est pas configuré’, __FILE); } == ‘’) { $return[‘launchable’] = ‘nok’; $return[‘launchable_message’] = (‘La clé d'application n'est pas configurée’, __FILE); }
}
.
.
. “
()
. .
php () { self:: $deamon_info = self::deamon_info(); ‘] != ‘ok’) {
    }

    $path = realpath(dirname(__FILE__) . '/../../resources/demond'); // répertoire du démon à modifier
    $cmd = system::) . " {$path}/demond.py"; // nom du démon à modifier
    $cmd .= ' --loglevel ' . log::convertLogLevel(log::getLogLevel(__CLASS__));
    $cmd .= ' --socketport ' . config::byKey('socketport', __CLASS__, '55009'); // port par défaut à modifier
    $cmd .= ' --callback ' . network::getNetworkAccess('internal', 'http:127.0.0.1:port:comp') . '/plugins/template/core/php/jeeTemplate.php'; // chemin de la callback url à modifier (voir ci-dessous)
    $cmd .= ' --user "' . trim(str_replace('"', '\"', config::byKey('user', __CLASS__))) . '"'; // on rajoute les paramètres utiles à votre démon, ici user
    $cmd .= ' --pswd "' . trim(str_replace('"', '\"', config::byKey('password', __CLASS__))) . '"'; // et password
    $cmd .= ' --apikey ' . jeedom::getApiKey(__CLASS__); // l'apikey pour authentifier les échanges suivants
    $cmd .= ' --p ' . jeedom::) . '/deamon.pid'; // et on précise le chemin vers le p file (ne pas modifier)
    log::
    $result = exec($cmd . ' >> ' . log::getPathToLog('template_daemon') . ' 2>&1 &'); // 'template_daemon' est le nom du  pour votre démon, vous devez nommer votre  en commençant par le plugin pour que le fichier apparaisse dans la page de config
    $i = 0;
    ) {
        $deamon_info = self::deamon_info();
        ') {
            break;
        }
        sleep(1);
        $i++;
    }
    ) {
        log::

    }
    message::

}
.
. . ::.
()
: .
php () { $pid_file = jeedom::) . ‘/deamon.pid’; // ne pas modifier )) { $p = intval(trim(file_get_contents($pid_file))); system:: } system:: sleep(1); }
.. .
###
. : .
.
####
. -)
.
php ) { $deamon_info = self::deamon_info(); ‘] != ‘ok’) {
    }
    $params['apikey'] = jeedom::getApiKey(__CLASS__);
    $payLoad = json_encode($params);
    $socket = socket_create(AF_INET, SOCK_STREAM, 0);
    .::


}
.
:
python ‘] != _apikey: : “ )) return try: ‘ : : ‘))
”
####
. ].
:
php <?php
{
 (!jeedom::

    die();
}
') != '') {

    die();
}
$result = json_decode(file_get_contents("php://input"), true);
 (!)) {
    die();
}

'])) {

} '])) {

}  {
    log::
} } ) {
log:: }
:
php (!jeedom::
    die();
}
.):
php ‘) != ‘’) {
    die();
}
:
php $result = json_decode(file_get_contents(“php://input”), true); (!)) { die(); }
:
php ‘])) {
} '])) {

}  {
    log::
}
:
python ‘ : ‘’ : ‘value2’ })
: .
##
.
.
:
.
. ..
.
- :
- ..
- ..
- :
- .
- .
. .
###
. :
json { “id” : “pluginID”, “name” : “pluginName”, … “hasDependency” : true, “hasOwnDeamon” : true, “maxDependancyInstallTime” : 30, … }
. . .
. .
###
####
:
pre-install:
:
json { “pre-install” : { “script” : “” }
post-install
. :
json { “post-install” : { “” : true, “script” : “” }
apt:
Exemple
json { “apt” : { “libav-tools” : {“alternative” : “]}, “ffmpeg” : {“alternative” : “]}, “python-pil” : {}, “php-gd” : {} } }
, .
pip3:
Exemple:
json { “apt” : { “” : {}, “” : {}, “” : {} }, “pip3” : { “wheel” : {}, “pyserial” : {}, “tornado” : {}, “zigpy” : {“reinstall” : true}, “zha-quirks” : {“reinstall” : true}, “zigpy-znp” : {“reinstall” : true}, “zigpy-xbee” : {“reinstall” : true}, “zigpy-deconz” : {“reinstall” : true}, “zigpy-zigate” : {“reinstall” : true}, “zigpy-cc” : {“reinstall” : true}, “bellows” : {“reinstall” : true} } }
**
.. ** () ::. Exemple: ::) . “ {$path}/demond.py”;`
npm:
., :
json { “apt” : { “nodejs” : {} }, “npm” : { “” : {} } }
composer:
.
#####
:
json { “plugin”:{ “mqtt2”: {} } }
###
.
####
.
php () { log:: #stype#. ‘ . jeedom::) . ‘:: }
.
- #stype#.#stype#. #stype#.
- .
-
`jeedom::) . ‘).
..
:
.
Je vous invite également à consulter cette qui offre une alternative: https://github.com/Mips2648/dependance.lib/blob/master/pyenv.md
bash
! -
fi } } “************” “ ” “************” ) }
}
}
“**********” “ “**********”
}
“************” “ “************” “ }
} ) “********” “ ” “********” }
:
… -).
bash
! -
fi
: ).
:
- ! .
- . .
- .
- : ….
. . . .
####
..
? .
:
php () { $ = array(); $return[‘log’] = log::getPathToLog(CLASS . ‘_update’); $return[‘progress_file’] = jeedom::) . ‘/dependance’; ::) . ‘/dependance’)) { $return[‘state’] = ‘in_progress’; } { ::getCmdSudo() . system::’) . ‘-|| $return[‘state’] = ‘nok’; } ::getCmdSudo() . ‘ | $return[‘state’] = ‘nok’; } { $return[‘state’] = ‘ok’; } }
}
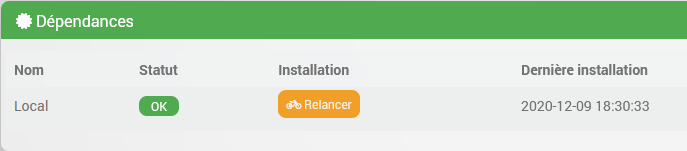
| : `system::getCmdSudo() . system::’) . ‘- | . : . |
| : | . : |
.
: .