Edisio EMV 400 Shutter
The module

The Jeedom visual
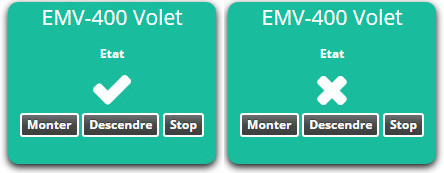
Summary
The EMV-400 micromodule will allow you to manage a bidirectional motor or electrical equipment. It allows the control of 2 Start / Stop outputs or of an Open / Stop / Close shutter.
In addition, interaction with other protocols is possible, it can be controlled by switches and / or remote controls from the Edisio brand, directly from Jeedom, but also by any Z-Wave transmitter on your network.
Each Edisio module on the electrical network, with the possibility of operating as a wireless repeater with the other modules, in order to ensure total coverage of your home.
Finally, each module can be used in remote mode, it is very practical because it allows to associate a transmitter without having to access the receiver.
IMPORTANT
Neutral is only necessary for “Shutter” mode”
Fonctions
- 2 relay outputs supplied
- Installs in a 55mm flush-mounted box or directly in the sash boxes
- Mode of use: On / Off, Open / Stop / Close
- Compatible with electronic and mechanical limit switches
- Remote mode
- Timer function: On / Off mode: 30min or 60min
- Signal replica (repeater)
- Bidirectional micromodule
- Low transmitter battery level
- Small, discreet and aesthetic
- Ease of use and installation
Technical characteristics
- Type of module: Edisio receiver
- Alimentation: 230VAC, 50Hz
- Wiring: 4 wires, 2 for controls and 2 for power
- Frequency: 868.3 MHz
- Powered outputs: 2 relays
- Maximum power: 2A per output
- Resistive load: 460W
- Other expenses: 100W
- Operating temperature: -10 ° C + 45 ° C
- Dimensions: 48x46x26mm
- Degree of protection: IP20
Module data
- Mark : Edisio Smart Home
- Name : EMV-400
General configuration
To configure the Edisio plugin and associate a module with Jeedom, refer to this Documentation.
IMPORTANT
For Jeedom to automatically create your transmitter modules, don’t forget to activate the option in the plugin configuration.
IMPORTANT
Conversely, Edisio receivers must be created manually in Jeedom.
DIP Switch and button “R”
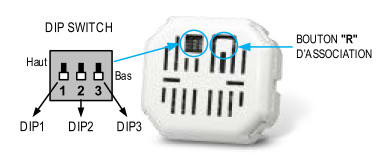
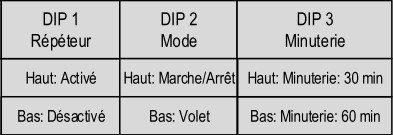
- The DIP Switch will allow you to adjust the parameters (Repeater / Shutter mode / lighting / Timer) of the module:
NOTE
To avoid unnecessary redundancies, never activate the “Repeater” mode on all receivers, maximum of 5 receivers per installation.
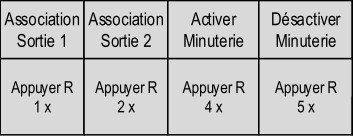
- The button “R”, will allow to associate a transmitter to the receiver, to activate or deactivate the timer function and to activate the remote mode :
NOTE
Pressing R 3x activates the remote mode.
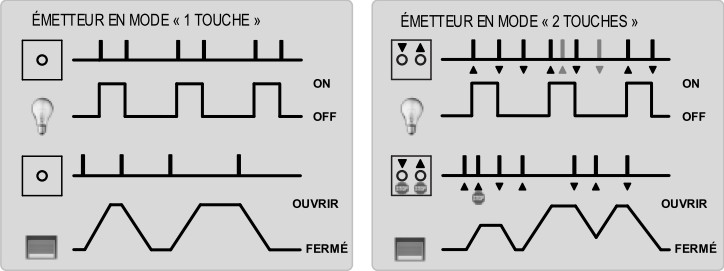
Function diagram
Depending on whether your transmitter is configured in “1 key” or “2 keys” mode, here is how the module works:
NOTE
Refer to the manufacturer’s documentation in order to configure your transmitter.
Timer function
The timer function automatically switches off the relays after 30 or 60 minutes.
NOTE
This function is only used in “Lighting” mode”
The “Shutter” mode”
The “Shutter” mode allows you to control a bidirectional electronic and mechanical limit switch from a distance.
IMPORTANT
Neutral is required
Electrical configuration and connections
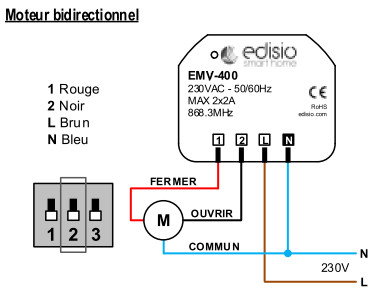
IMPORTANT
In order for the module to be in “Shutter” mode, the DIP Switch 2 must be at the bottom
IMPORTANT
NEVER CONNECT UNDER VOLTAGE
Creation of the module in Jeedom
To associate an Edisio receiver module with Jeedom, you must manually create a device.
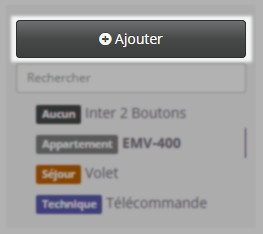
Once your equipment is created, you should get this :
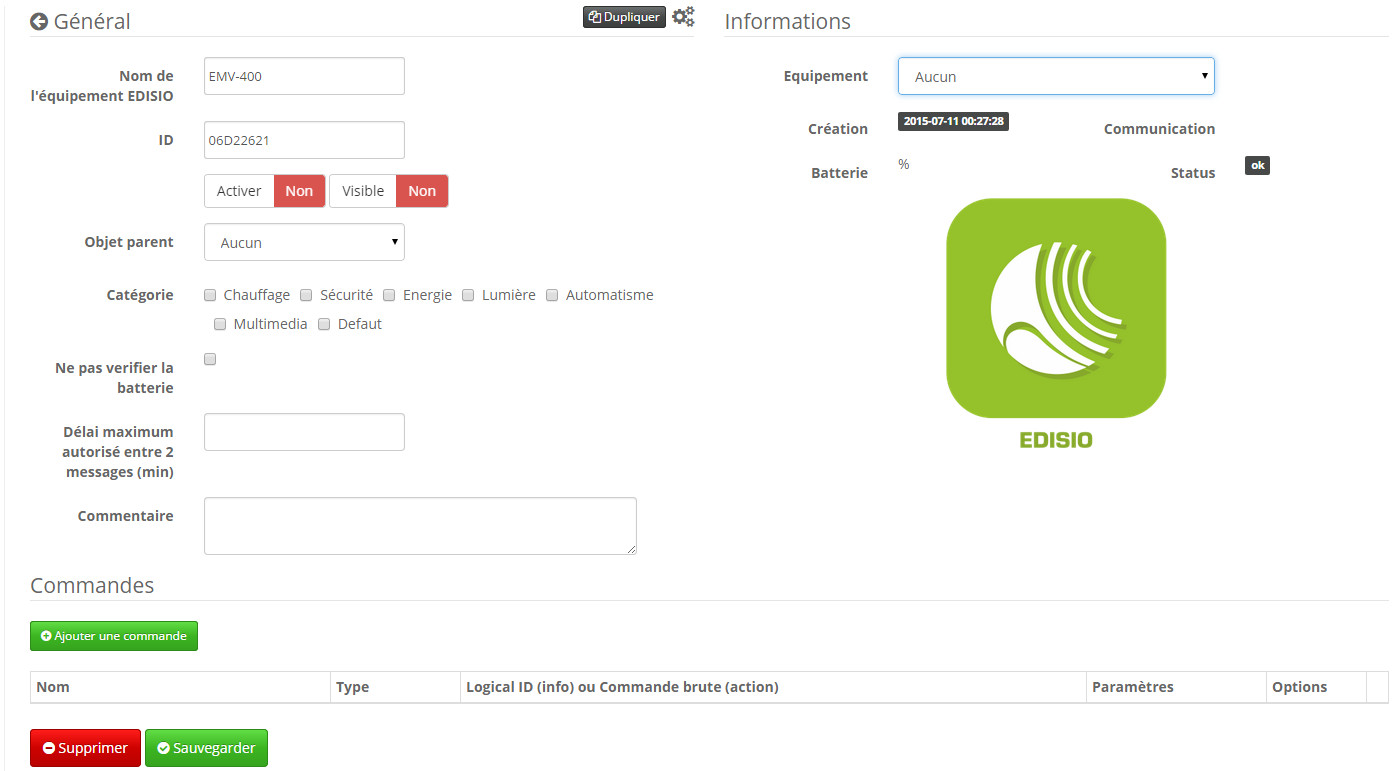
NOTE
Remember to activate your new equipment.
In the list of equipment, on the right, select “Micro-module shutter roulant” :

Commandes
Once your equipment is saved, you should get the commands associated with the module :
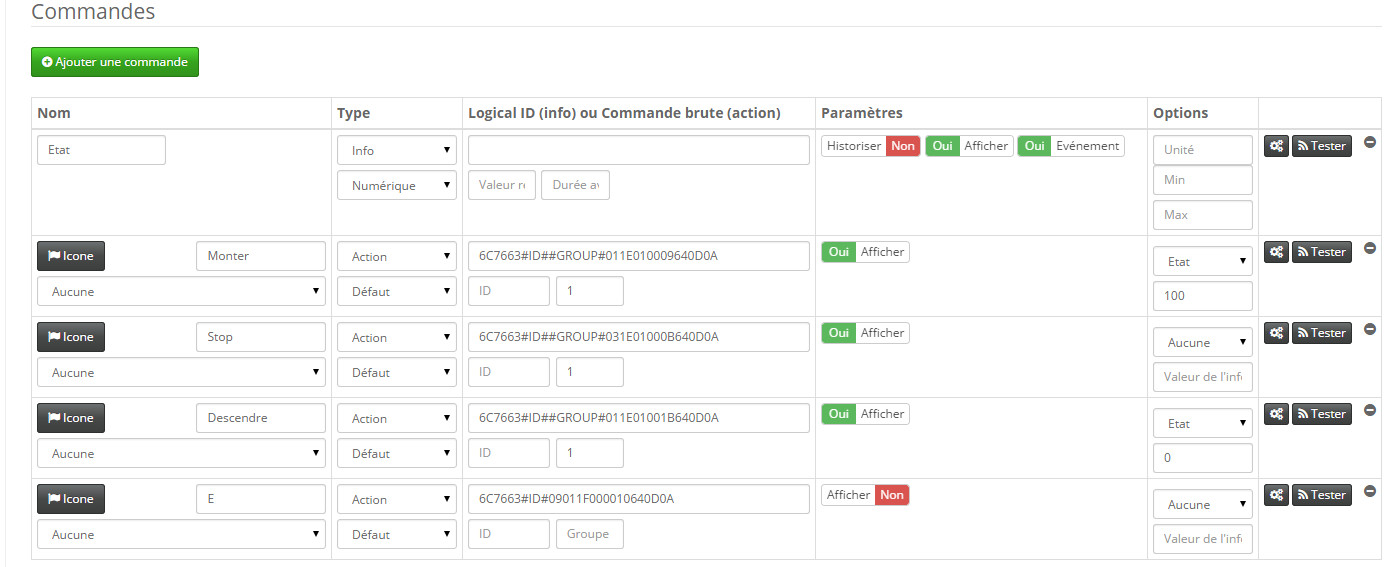
Here is the list of commands :
- State : This is the command that simulates the return of status
- Ascend : This is the command that opens the shutter
- STOP : It is the command which makes it possible to stop the movement of the shutter
- Go down : This is the command that closes the shutter
- E : This is the command that allows you to use the remote mode
IMPORTANT
Status feedback is simulated by Jeedom. Therefore, if you use another transmitter, Jeedom will not be able to update the receiver status.
Informations
Once your equipment is associated with Jeedom, various information will be available :

- Creation : Indicates the date on which the equipment was created
- Communication : Indicates the last communication recorded between Jeedom and the micro-module
- Drums : Indicates the battery status for battery modules
- STATUS : Returns the status of the module
Association of the micromodule with Jeedom
So that you can interact with Jeedom, as if it were an Edisio transmitter.
NOTE
One of the big advantages of Edisio is that a receiver can have several associated transmitters
Standard method
Each output must be associated with a Jeedom command:
- Associate output 1 :
- Press 1x on the “R” of the receiver, a single beep (short in repetition) signals the programming of output 1 activated.
- Within 10 seconds, press “Test” on the “Open” command in Jeedom, a continuous beep signals the association of output 1 with Jeedom.
- Within 10 sec, press “R” on the receiver again, to confirm the association, the beep stops.
- Associate output 2 :
- Press 2x on the “R” of the receiver, double beep (short in repetition) signals the programming of output 2 activated.
- Within 10 seconds, press “Test” on the “Close” command in Jeedom, a continuous beep signals the association of output 2 with Jeedom.
- Within 10 sec, press “R” on the receiver again, to confirm the association, the beep stops.
NOTE
There is no need to associate the “Stop” command, it is done automatically.
Remote method
We talked about it at the beginning of this documentation, in the case of modules already embedded in false ceilings or even attics. This method allows the addition of a new transmitter without accessing the “R” of the receiver.
- Associate the button “R” :
- Press 3x on “R” on the receiver, triple beep (short in repetition) signals the active programming mode.
- Within 10 seconds, press “Test” on the “E” command in Jeedom, a continuous beep signals the association with Jeedom.
- Within 10 sec, press “E” on the receiver again, to confirm the association, the beep stops.
It’s done, your Jeedom is now associated and its command “E” now replaces the “R” button on the receiver.
- Associate a new transmitter with a receiver with Jeedom already associated :
- Exit 1 :
- Press 1x on “Test” command “E” in Jeedom, single beep (short in repetition) signals the programming of output 1 activated.
- Within 10 seconds, press one of the “C” keys on the new transmitter to be associated, a continuous beep signals the association of output 1.
- Within 10 seconds, press “Test” again on the “E” command in Jeedom, to confirm the association, the beep stops.
- Exit 2 :
- Press 2x on “Test” of the “E” command in Jeedom, double beep (short in repetition) signals the programming of output 2 activated.
- Within 10 seconds, press one of the “C” keys on the new transmitter to be associated, a continuous beep signals the association of output 2.
- Within 10 seconds, press “Test” again on the “E” command in Jeedom, to confirm the association, the beep stops.
- Exit 1 :
NOTE
You can repeat as many times as you want to associate transmitters with the receiver
Alternative visual
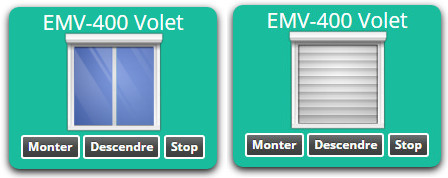
Faq.
How to clear receiver memory ?
Press and hold the “R” for 10 seconds, until the continuous beep sound.