Synology use vpn
From a web browser on a computer connected to the same network as the Synology
Go to the DSM interface and log in with an admin account then go to the main menu and select Package Center
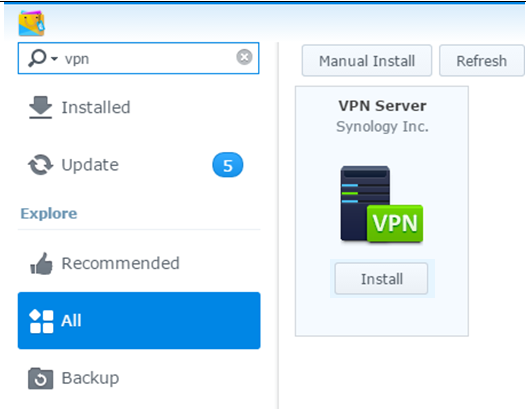
Top left in the window do a search with the word VPN. VPN Server should appear, then click install.
Go back to the main menu and select VPN Server
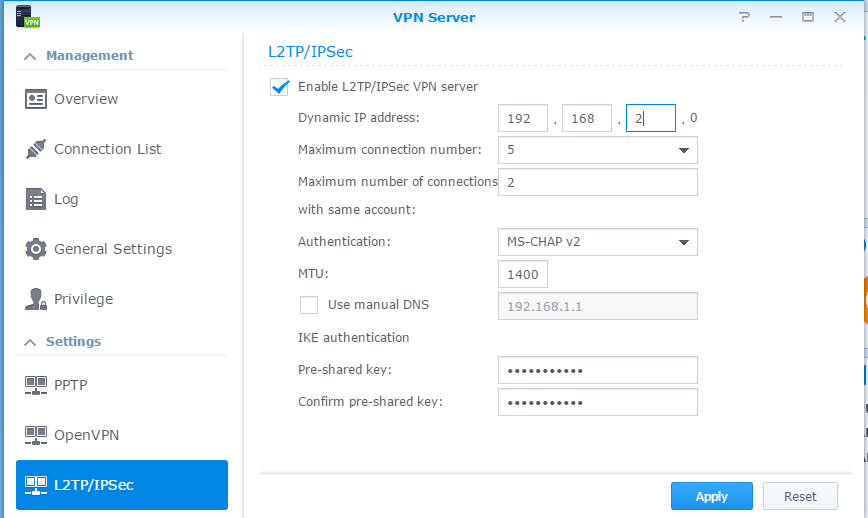
When the window opens, go to L2TP / IPSEC
Choose the option Enable L2TP / IPsec VPN server
In Dynamic IP Address, enter a number which will correspond to the sub-network for assigning the IPs of your VPN devices on the internal network of your home. NB : do not choose the same thing as the default subnet of your box ex at free the machines subnet is 192.168.1.0 so in the example we put 2
Then enter the maximum number of connections you want to allow on the VPN server, then the maximum number of simultaneous connections for a user
Finally enter a sharing key NB : it is a password that must be entered in the VPN configuration on the mobile or tablet.
Then apply
A message then indicates the ports which must be redirected on your Internet Box to your NAS.

Allow users to use the VPN service on the NAS
Go back to the main menu and select VPN Server

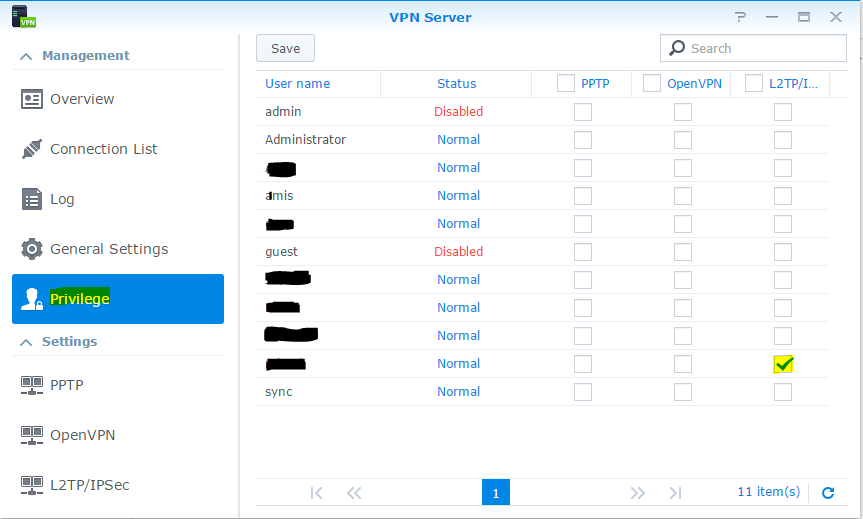
In the left part select Privilege
Uncheck all boxes under PPTP Open VPN and L2TP
Check only the box in front of the user you want to authorize to use the VPN .
Tip
It is advisable to create a user only for the VPN and without any other rights / authorization than doing the VPN.
Redirect the ports of your BOX
In the browser enter 192.168.1.1. Click on Freebox settings

Select advanced mode

Select Port Management

Add a redirect

Enter the parameters as follows.
Tip
Destination ID is the only thing that depends on your installation, you must put the IP of your Synology NAS
Save
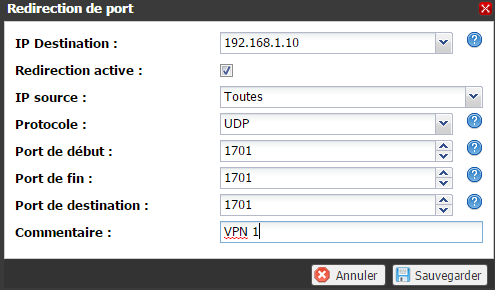
We then note that the configuration is taken into account

Repeat the operation with UDP ports 500 and 4500
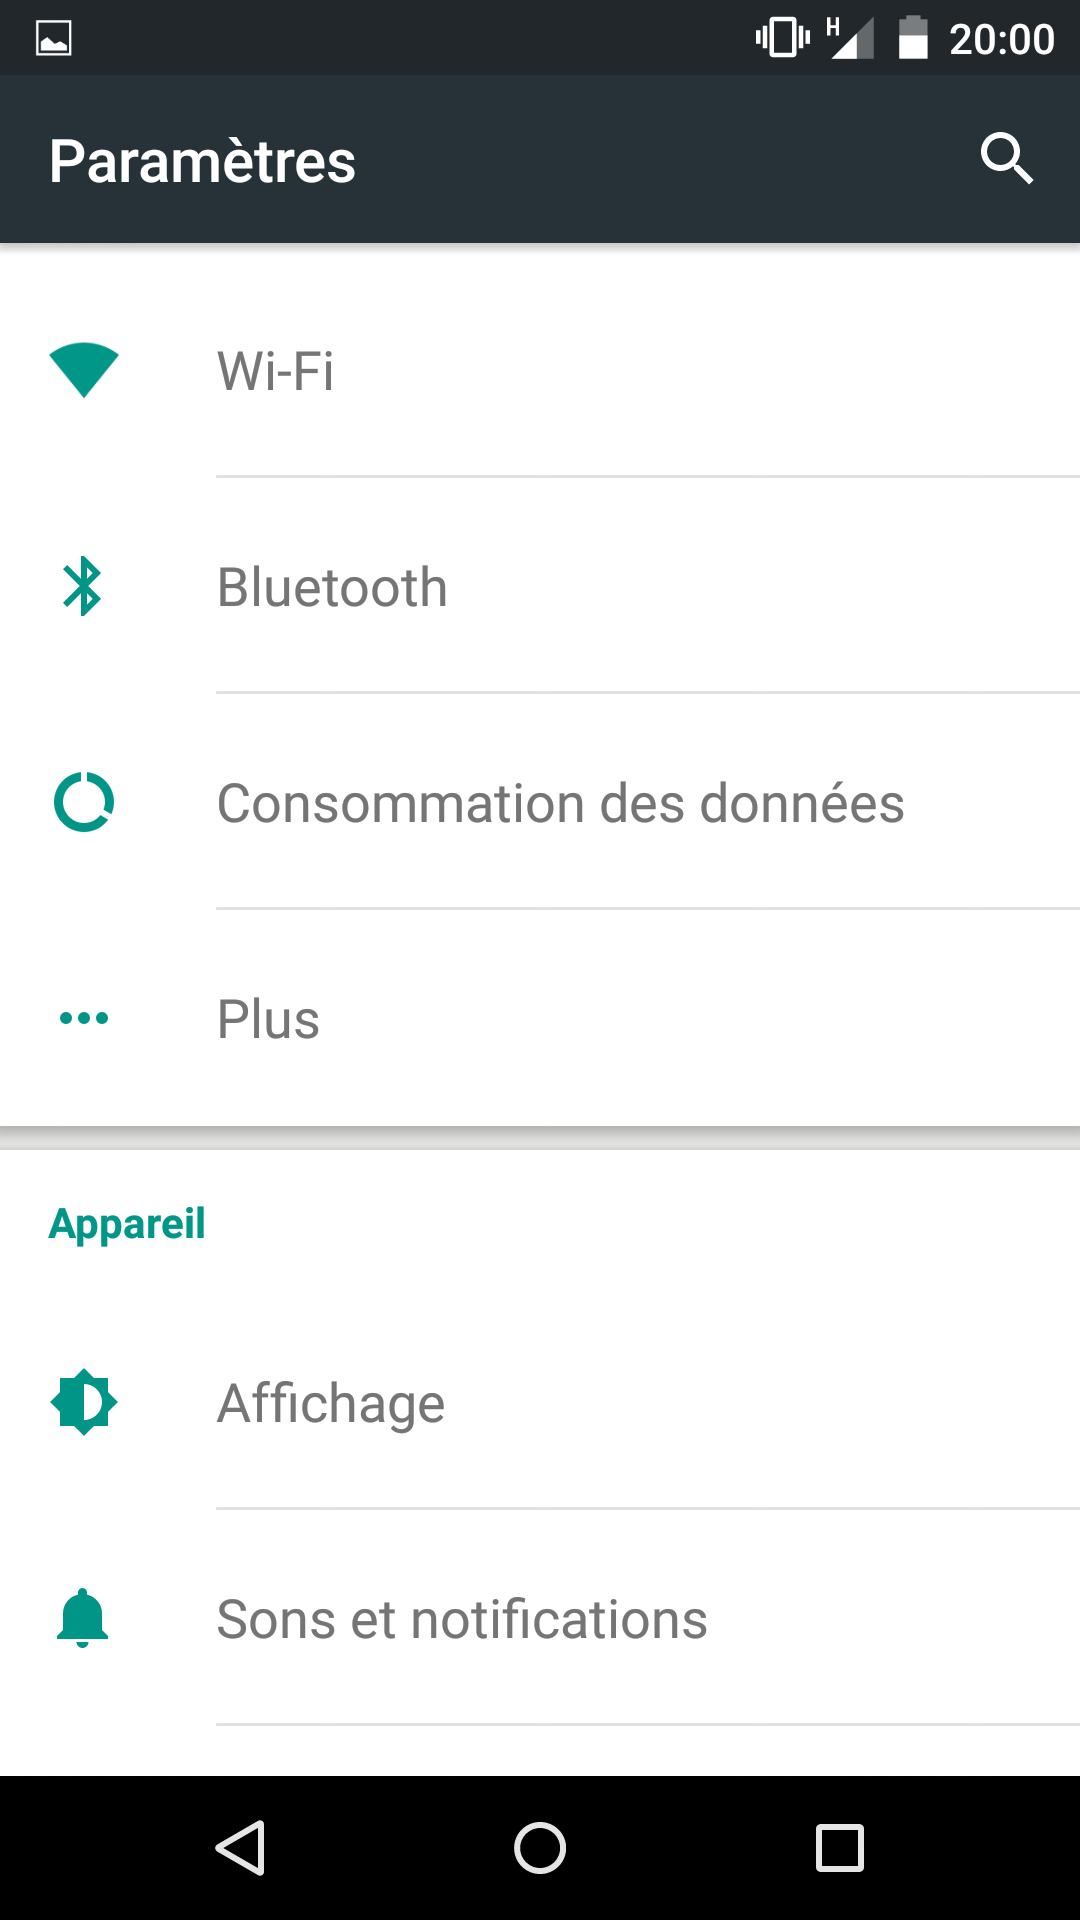
Configure the VPN on your mobile
Go to application and select Settings

Click on… More
Click on VPN
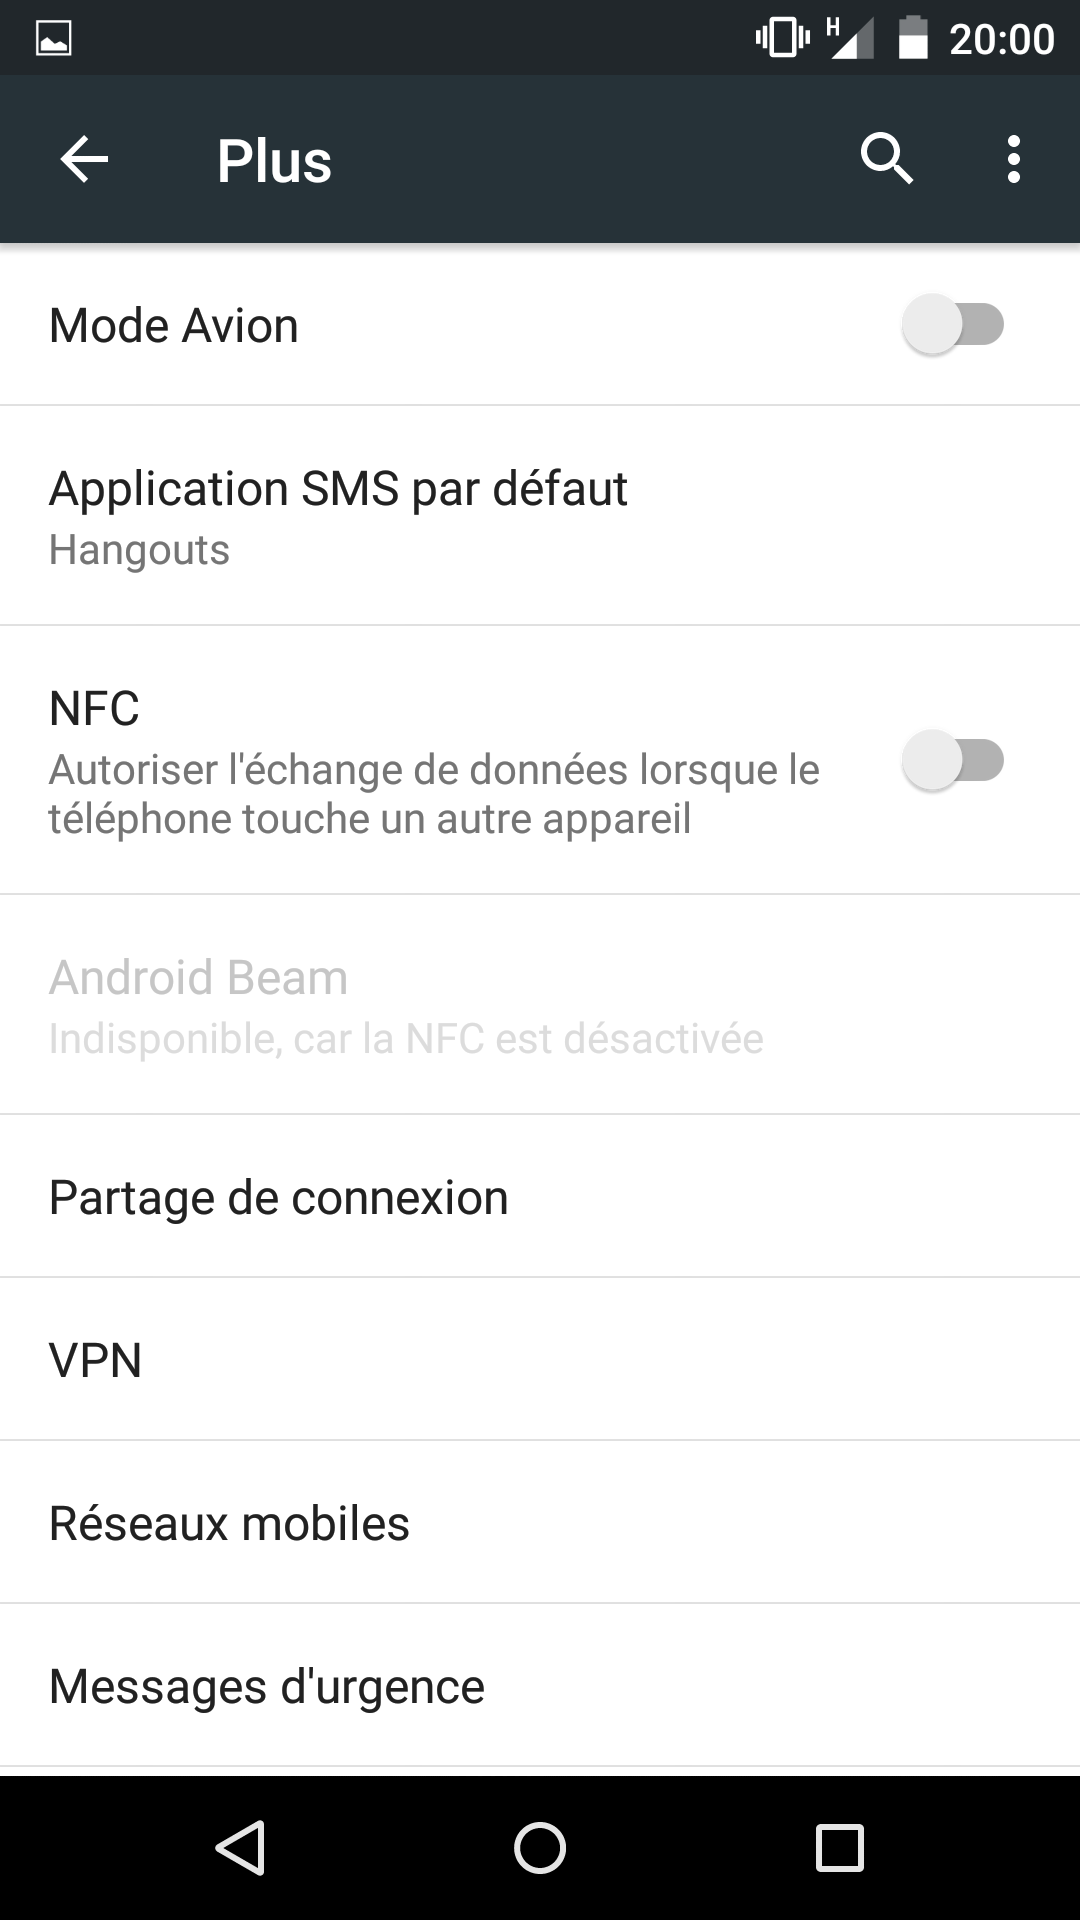
Click on the + at the top right

Give a name to the VPN access, set as L2TP / IPSec PSK type, enter the public address of your internet box (or a DNS name if you have one) and enter the shared key entered in the section Configure a VPN server :
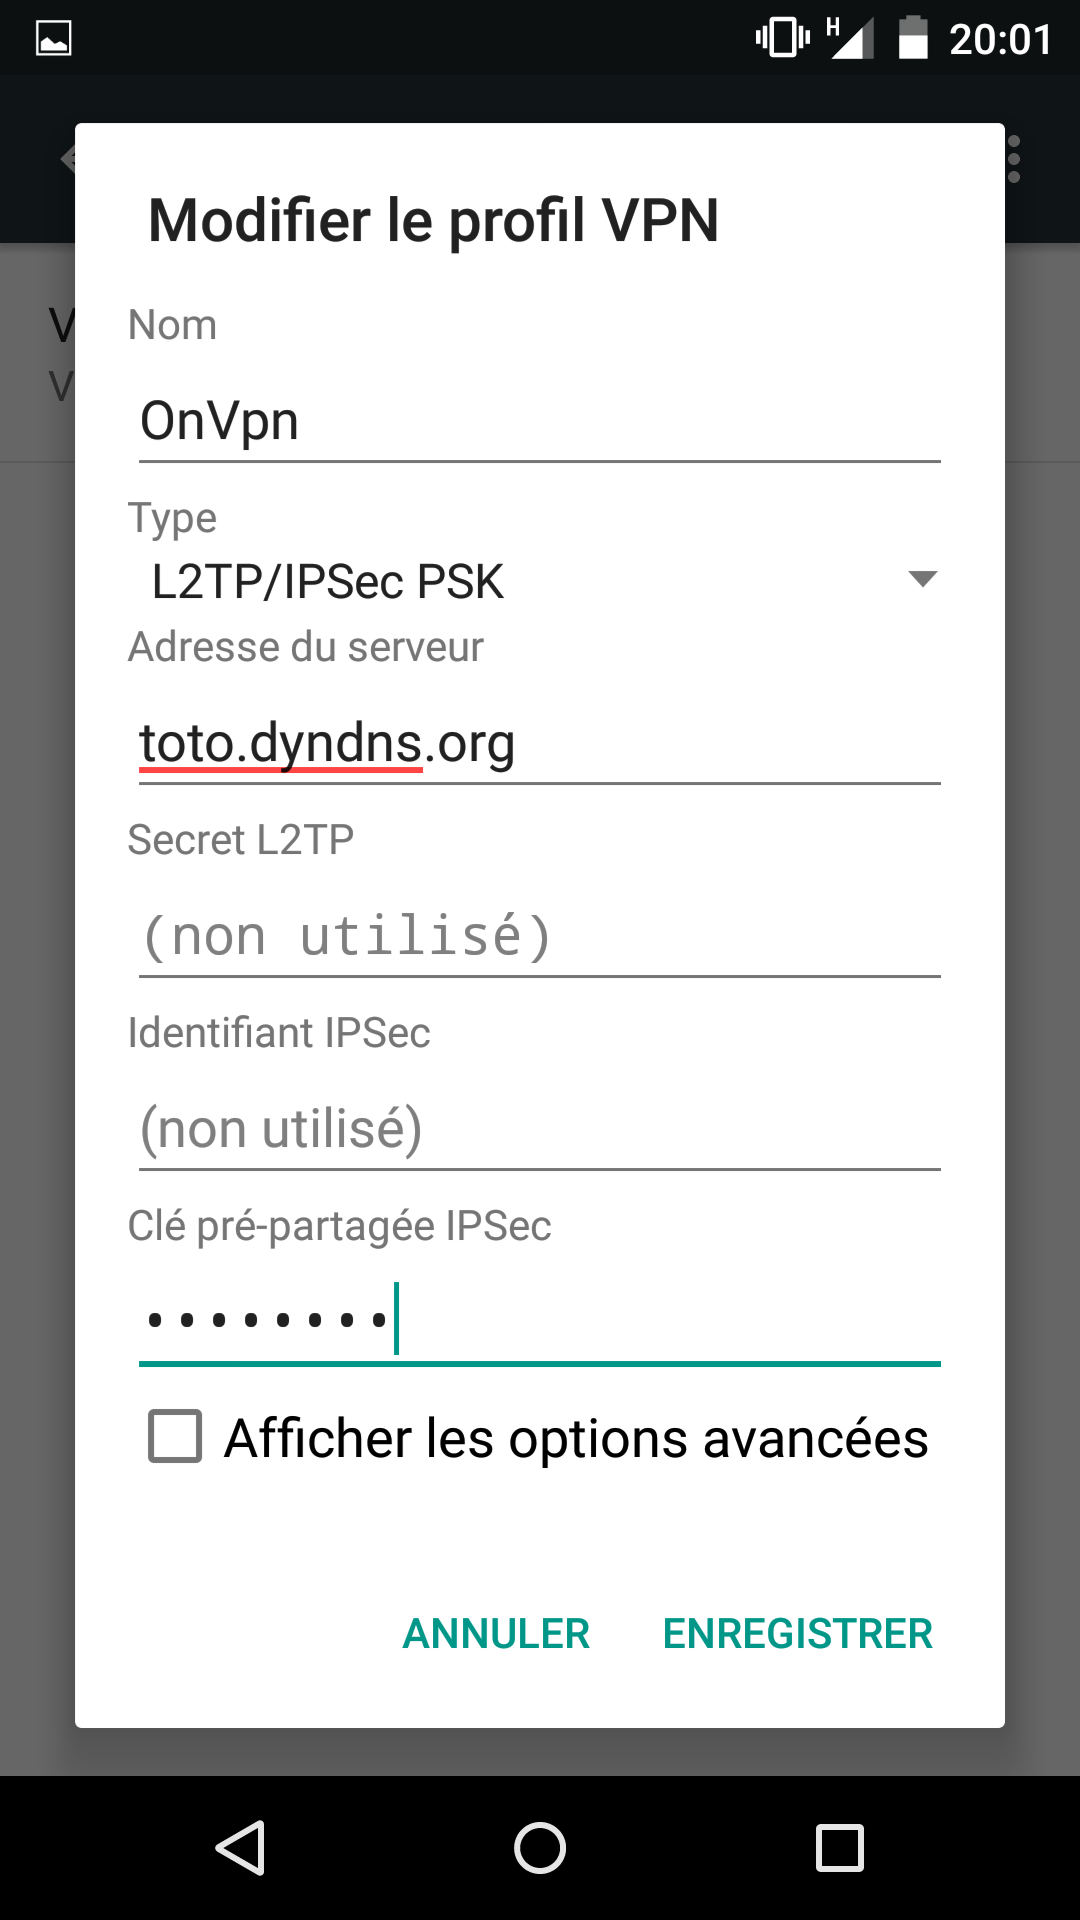
Now to launch the VPN, just click on the new line that appeared with the name of your VPN tunnel

Then enter the login and password of the user who has been configured in the section Configure a VPN server
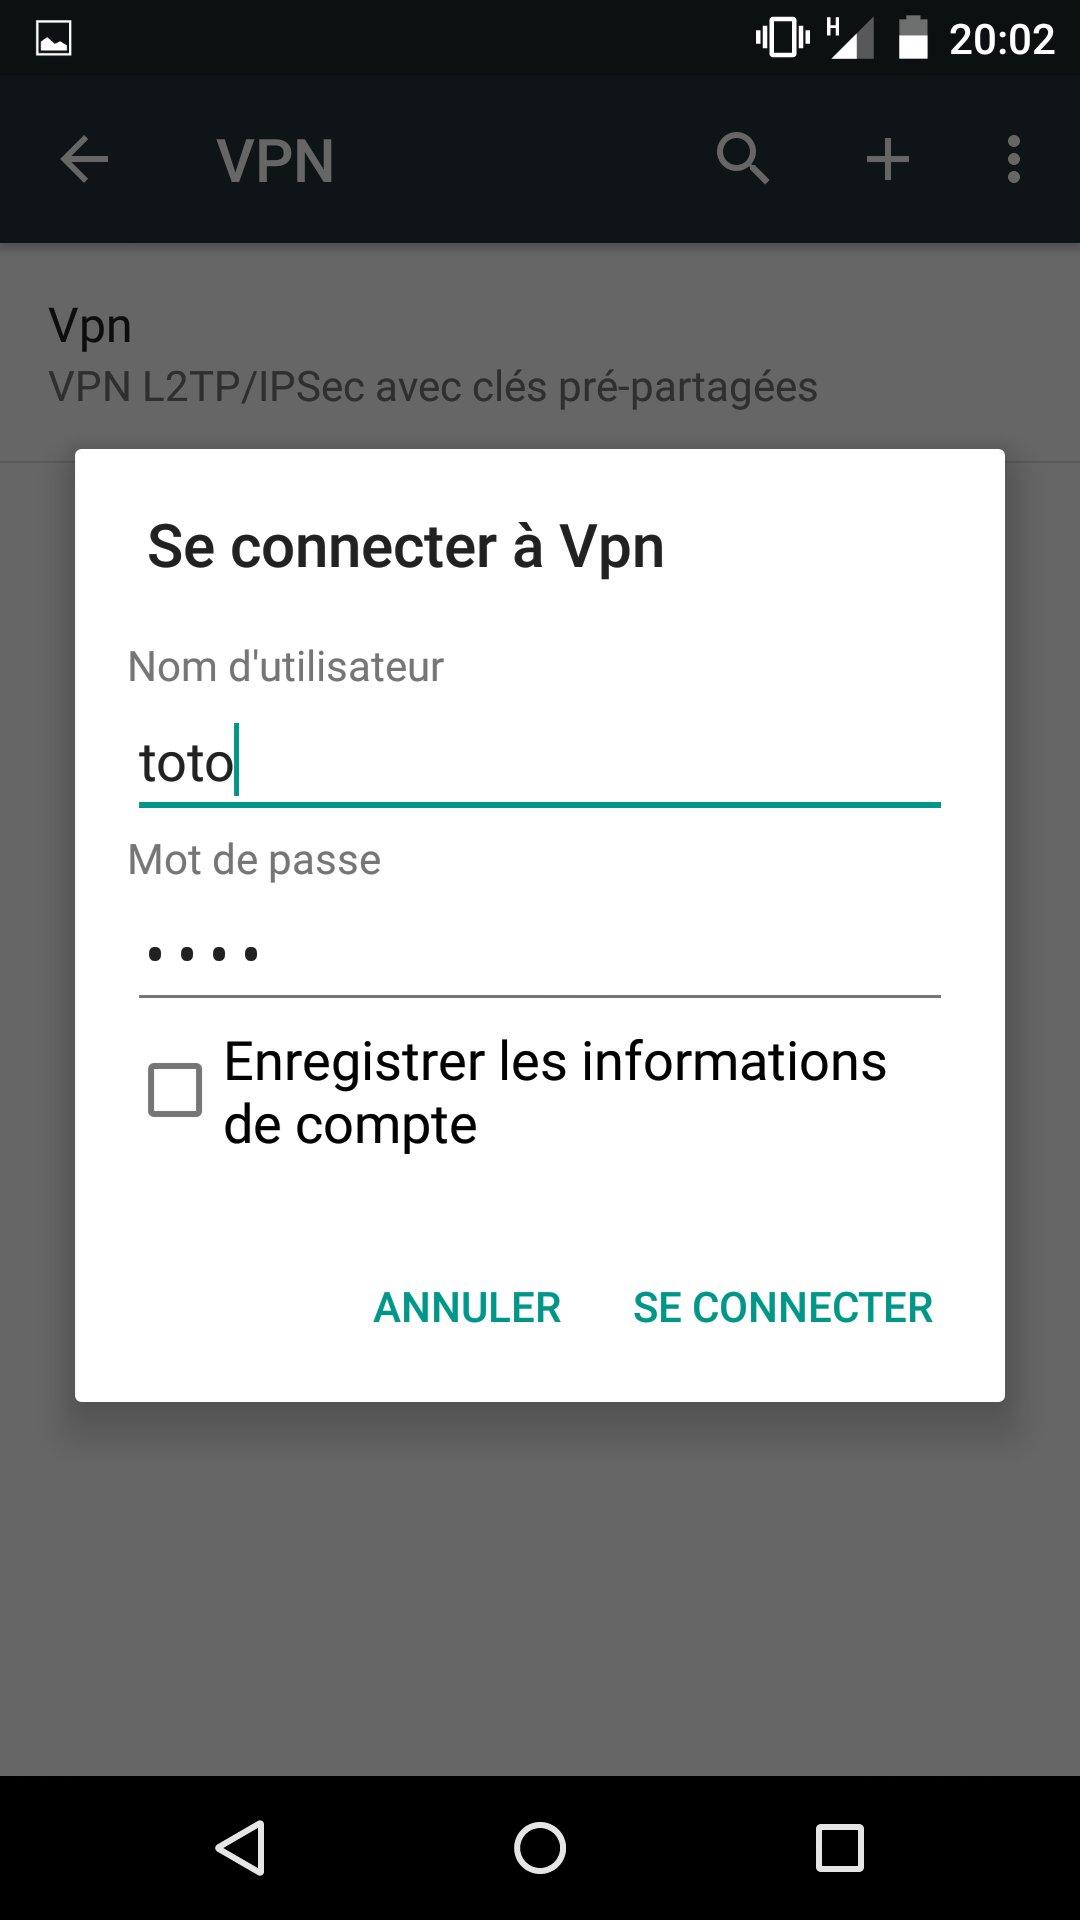
And that’s all you do on your phone, it’s like being on WiFi from home !