Jeedom Link plugin
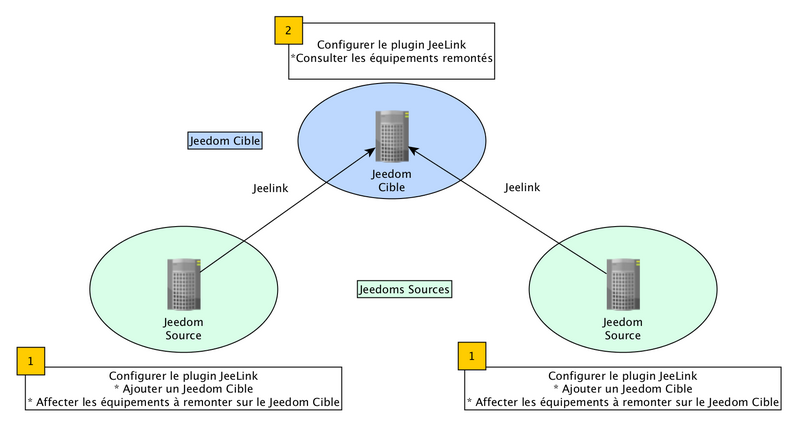
The plugin Jeedom Link (also called Jeelink) allows equipment to be uploaded from one or more “source” Jeedom installations to one (or more) “target” Jeedom”.
The plugin must be installed on each Jeedom, whether source or target.
Before we start, let’s make sure we use the same terms :
- Jeedom Source : Jeedom server on which the equipment to be reassembled on the Jeedom Target.
- Jeedom Target : Jeedom server which will receive and centralize the equipment brought up by one or more Jeedoms sources.
- Assignment : configuration made at the level of the Jeedom Source to select the equipment to be uploaded to the Jeedom Target.
INFORMATION
For a better reading and understanding of this documentation, the screenshots on a white background correspond to the Jeedom Source and those with a black background Jeedom Target.
Configuration
Plugin configuration
This plugin does not require any special configuration and simply needs to be activated after installation.
Important
Please note, deactivating the plugin results in the deletion of the target Jeedoms of the plugin without any means of recovering them (except restoring a backup)
Important
The network configurations of all Jeedoms (source & target) MUST be OK otherwise the plugin will not work.
Important
You should definitely not have the same API key on several Jeedom targets. The key of a device is based on the API key (therefore it should not be changed after configuration) and the source id of the device. Having the same API key on the target Jeedom will therefore cause synchronization problems with equipment that may not appear on the source.
Target Jeedom configuration
The first step will be to define a Jeedom Target since Jeedom Source (the one who holds the equipment to be reassembled).
To do so, go to the menu Plugins → Communication → Jeedom Link then click the green button Target Jeedoms.
A window will open from which you can add or modify Jeedom (s) Target (s)). To add a Jeedom Target, just fill in :
- The name of Jeedom Target.
- The IP address or DNS name to which the Jeedom Target can be reached.
- The Jeedom Link plugin API key from Jeedom Target.
- The access mode, internal or external (used for feedback from the Jeedom Source to the Jeedom Target).

TRICK
You will find the Jeedom Link API Key, specific to each installation, in the menu Settings → System → Configuration → PLC.
Equipment allocation
After performing the configuration of the Jeedom Target on the Jeedom Source, you have to go to the tab Assignment to select the devices to be transmitted to the Jeedom Target. All commands for each piece of equipment will be automatically created and configured on the Jeedom Target.

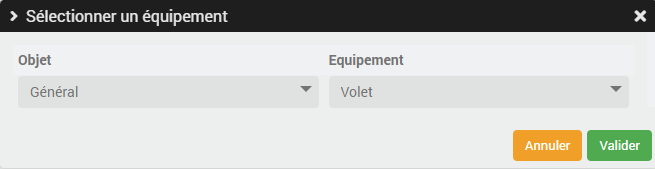
Add the equipment you want to upload to the Jeedom Target clicking on Add equipment then select the object and the equipment :
INFORMATION
Plugins using a specific widget will not find it on the Jeedom Target (Plugin Camera, Networks, etc.).
Important
As a security measure, deleting a device assigned to a Jeedom Target since a Jeedom Source don’t delete it on the Jeedom Target.
It only remains to To safeguard for the link to be made and the selected equipment to be transmitted from the Jeedom Source to Jeedom Target.
Equipment configuration
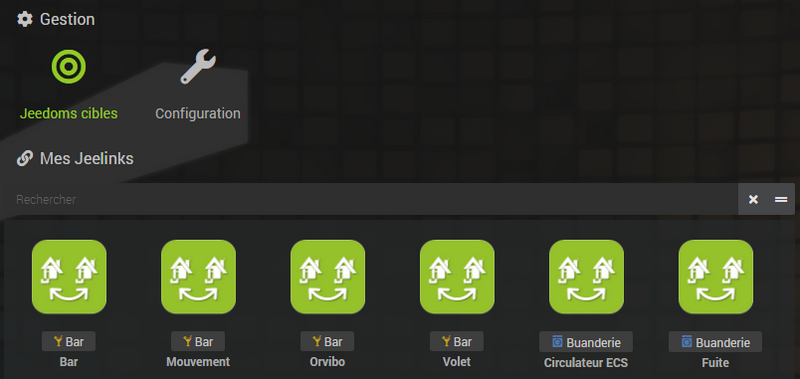
Now let’s head to the menu Plugins → Communication → Jeedom Link from Jeedom Target to see the automatic creation of the previously selected equipment :
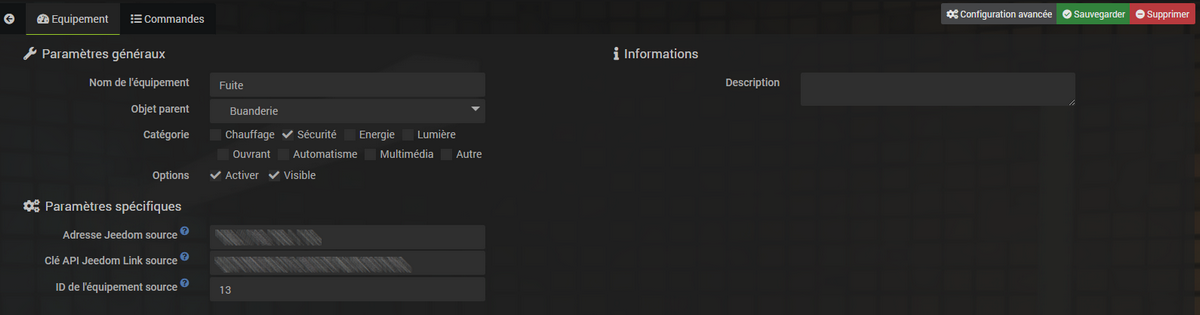
Like any Jeedom equipment, you access its configuration page by clicking on it :
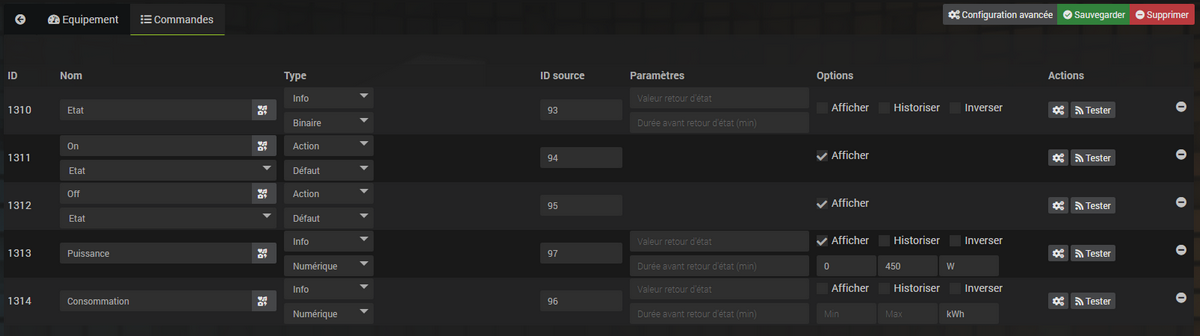
In the tab Commands, you access all the parameters of the equipment controls :
Important
As for the equipment affected on a Jeedom Source, deleting a piece of equipment on a Jeedom Target don’t delete it on the Jeedom Source.
Modifying Jeedom source
The following 3 parameters are used to replace a Jeedom Source without data loss (history for example) :
- Source Jeedom address
- Jeedom Link source API key
- Source Device ID and Source ID some orders.
To do this, simply enter the new address and the new Jeedom Link API key of the source Jeedom and change the identifiers of the equipment and commands.
FAQ
I have errors :
You are not authorized to perform this actionMake sure the Jeedom Link API keys be well informed :
- The Jeedom Link API Key from Jeedom Source on each Jeelink equipment of the Jeedom Target.
- The Jeedom Link API Key from Jeedom Target on the configuration page Target Jeedoms from Jeedom Source.