Sarah plugin
Plugin allowing Jeedom to communicate with the SARAH application (voice recognition). Make voice announcements and play sounds from Jeedom.
Setup
SARAH plugin adds voice recognition to speak to Jeedom, make an announcement or play a sound from Jeedom.
Plugin configuration
Once the SARAH plugin installed on Jeedom from the Market, click on Activate.
Configure Sarah’s name (default Sarah, but you can put Jarvis or Jeedom for example).
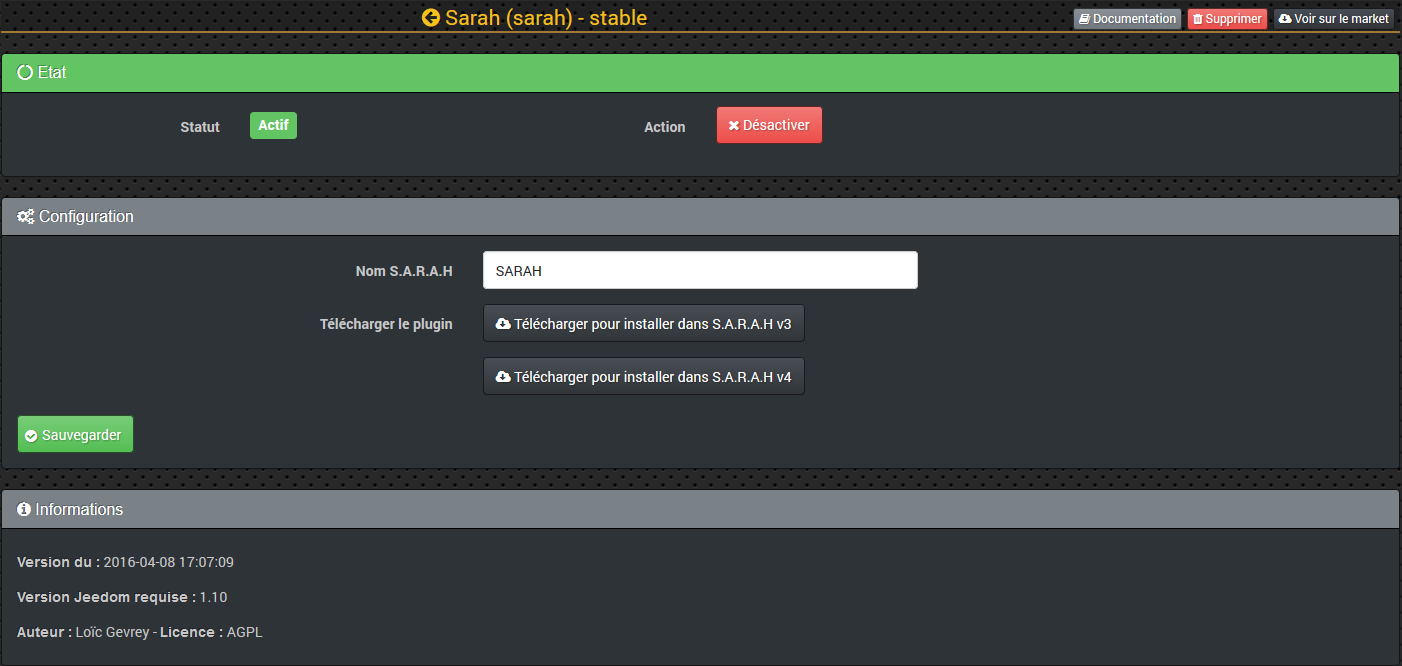
Then click on one of the buttons to download the plugin Jeedom for the version of SARAH you are using, v3 or v4.
Once downloaded, stop the SARAH Server and Client Unzip the archive in the folder Plugins SARAH on the client workstation (Windows compatible only) : http://encausse.wordpress.com/s-a-r-a-h/
When done, you can restart the SARAH client and server..
Equipment configuration
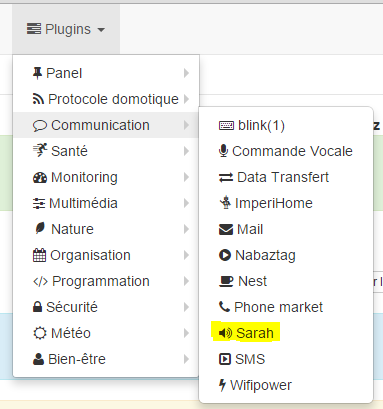
The configuration of SARAH equipment is accessible from the Plugins menu :
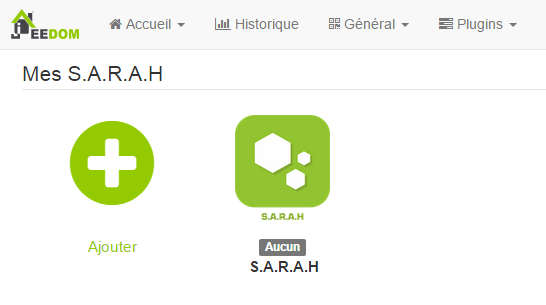
This is what the SARAH plugin page looks like (Here, with already 1 device) :
Once you click on one of them, you get :
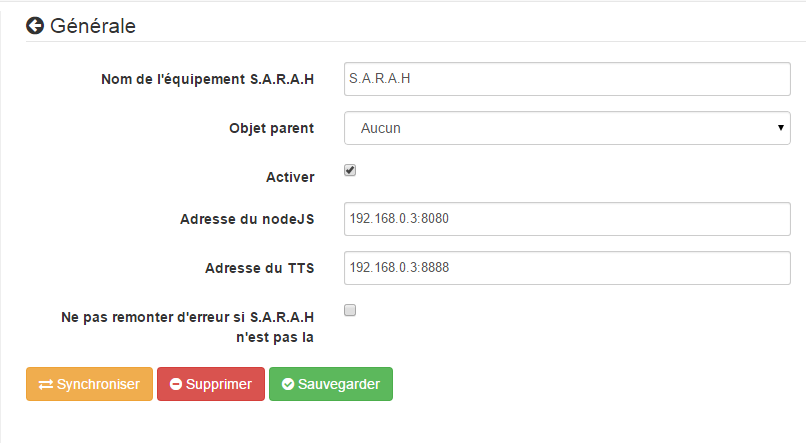
You will find here :
- Name of SARAH equipment : name of your SARAH equipment.,
- Parent object : indicates the parent object to which the equipment belongs.
- Activate : makes your equipment active,
- NodeJS address : SARAH IP + JS node port (by default the port is 8080)
- TTS address : SARAH IP + TTS server port (default port is 8888)
- Do not report an error if SARAH is not there : Check if SARAH is not started continuously
Each SARAH type equipment also creates an order :
-
Said : Which allows in the scenarios to make say a text to Jeedom. It is possible to announce a sentence randomly by separating your sentences with a pipe : Example : The front door is open. A person opened the front door. Entrance door open. Thus, during the announcement, one of its 3 sentences will be chosen at random. - To play : Which allows to execute an audio file of type .mp3 or .wav. These audio files should be placed for the v3 : in the file “medias” at the root or V4 : in the file “customer / media” of your SARAH application In your scenario, it will suffice to indicate the name of your audio file to be executed.

- Update grammar : Which allows via a scenario, to regenerate the XML grammar from Jeedom interactions.
The button “synchronize” allows to send to SARAH the list of all interactions, it must be done each time the interactions are updated.
If you want to use the function Ask from SARAH, it is possible to do it from a Jeedom scenario using an action “Do a request”.
Here is a simple example of use :
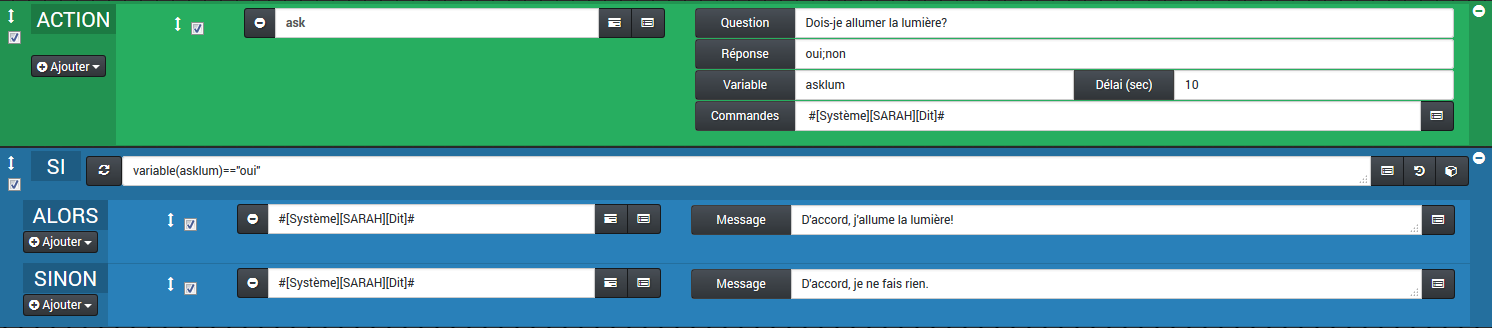
When you have added the action command “Do a request”, you will see 5 fields appear to be completed :
- Question : The question you want Jeedom to ask you.
- Reply : The choice of answers you want to be able to interact following the question. Each answer must be separated by a semicolon.
- Variable : This will be the name of the variable in which you would like your answer to be recorded, so that you can make an evaluation for the rest of the scenario.
- Delay (sec) : This is the time in seconds, before the scenario continues to perform the evaluation, if no response is given (Timeout).
- Commands : Will be order “Said” of your SARAH equipment.
Configuration in SARAH.
On the SARAH interface, you should have a Portlet with the Logo Jeedom.
SARAH v3 :
Click on the double arrows at the top of the Portlet to rotate the image for the rest, click on the key at the bottom left of the Portlet to access the Plugin configuration window.
SARAH v4 :
Click on the star wheel at the bottom of the Portlet and then on Configure the extension to access the Plugin configuration window.
IN addrJeedom, replace \ [IP_JEEDOM ] by the IP of your Jeedom and replace \ [PORT_JEEDOM ], by wearing your Jeedom. If your Jeedom uses the extension / jeedom, do not forget to indicate it after wearing.
IN apikeyJeedom, replace \ [CLE_API_JEEDOM ] by the API key of your Jeedom which you can find in the Configuration page of your Jeedom.
And to finish, click on Save.
Use case
Examples :
- Cela peut vous permettre de connaître toutes les remontées d’informations des différents capteurs (type “Sarah combien fait-il dehors?” ou “Sarah qu’elle est la température de la chambre”).
- Vous pouvez également piloter les lumières (“Sarah allume la lumière du salon”), pour cela il faut bien sur avoir configuré les interactions.
- A person presses the button on the wireless doorbell (RF433, Z-wave, etc.), Jeedom emits a sound via SARAH, announces the presence of a visitor and asks you the question, “then- I open the door ?”.
- Your washing machine is in the cellar, the program is finished, SARAH plays a “ding, dong” sound and announces that the program has ended. Then she asks you the question, “should I turn off the washing machine ?”.
The only limit will be your imagination.