Blink plugin (1)
Plugin used to control a blink key (1).
Setup
The plugin does not require any configuration, you just have to activate it :

Equipment configuration
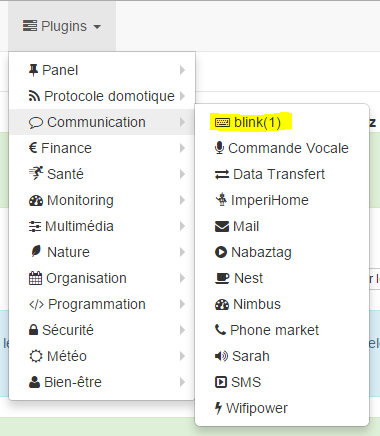
The configuration of blink devices (1) is accessible from the Plugins menu :
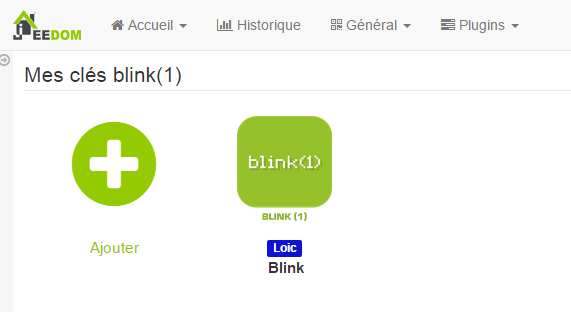
This is what the blink (1) plugin page looks like (here already with equipment) :
This is what the configuration page for a blink device looks like (1) :
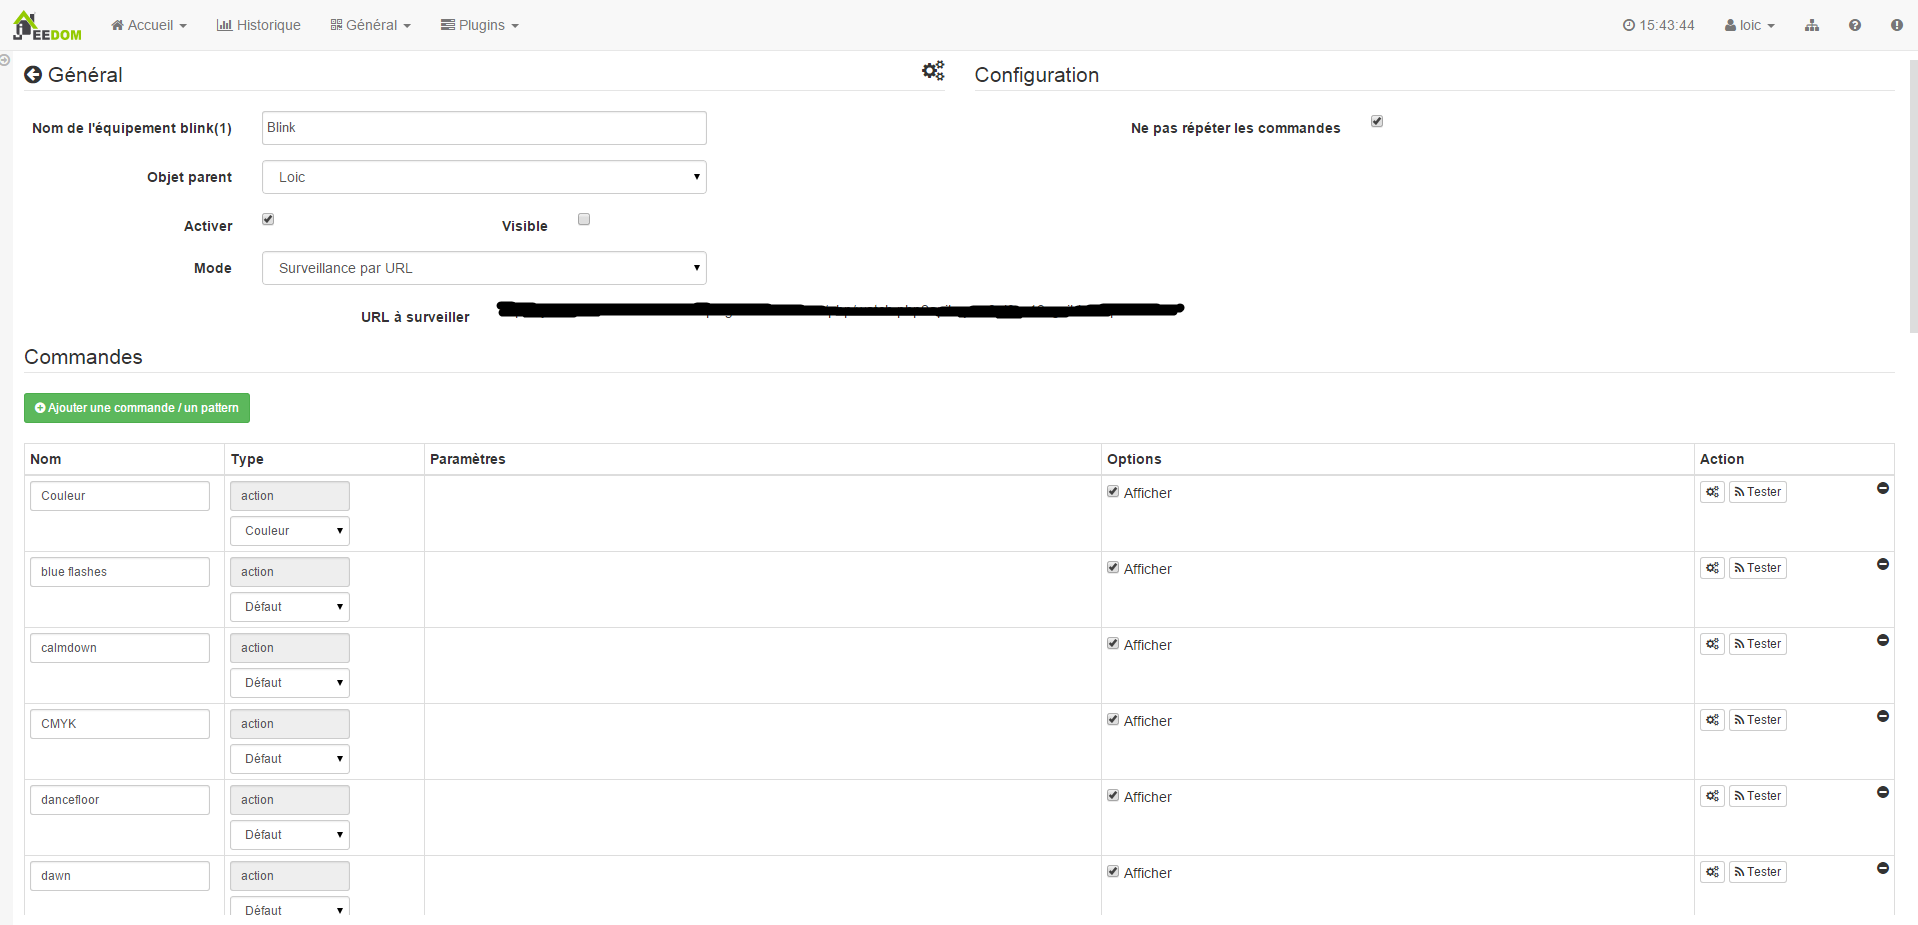
Here you find all the configuration of your equipment :
- Name of the blink(1) equipment : name of your blink equipment (1)
- Parent object : indicates the parent object to which the equipment belongs
- Activate : makes your equipment active
- Visible : makes it visible on the dashboard
- Fashion : the mode in which you want to operate your blink (1) (see below for the description)
Below you find the list of orders :
- the name displayed on the dashboard
- type and subtype
- the value : allows to give the value of the command according to another command, a key (case of a virtual switch), a calculation….
- Settings : name of the pattern to launch or of the command to launch
- Show : allows to display the data on the dashboard
-
advanced configuration (small notched wheels) : displays the advanced configuration of the command (logging method, widget, etc.)
- Test : Used to test the command
- delete (sign -) : allows to delete the command
“Local” mode”

Mode to use if the blink (1) is connected to one of Jeedom’s USB ports. The only parameter in this mode is not mandatory and allows you to select a blink (1) in particular if you have several connected.
Blink API Calls Mode (1)”

In this mode, Jeedom will directly call the blink1control API, so Jeedom must be able to directly join the system on which the blink (1) key is installed.
In this mode the configuration parameters are :
- Address or IP : address or ip where the blink key (1) is installed
- Port : port on which the blink1control application is listening
- Pattern : allows to synchronize the patterns with those of the blink1control application
Installation of the blink1control application
The blink1control app can be found here, in the download part, it is available for windows and mac. Once downloaded, launch the installation of the application.
Configuration of the blink1control application
Once installed and launched you must have :
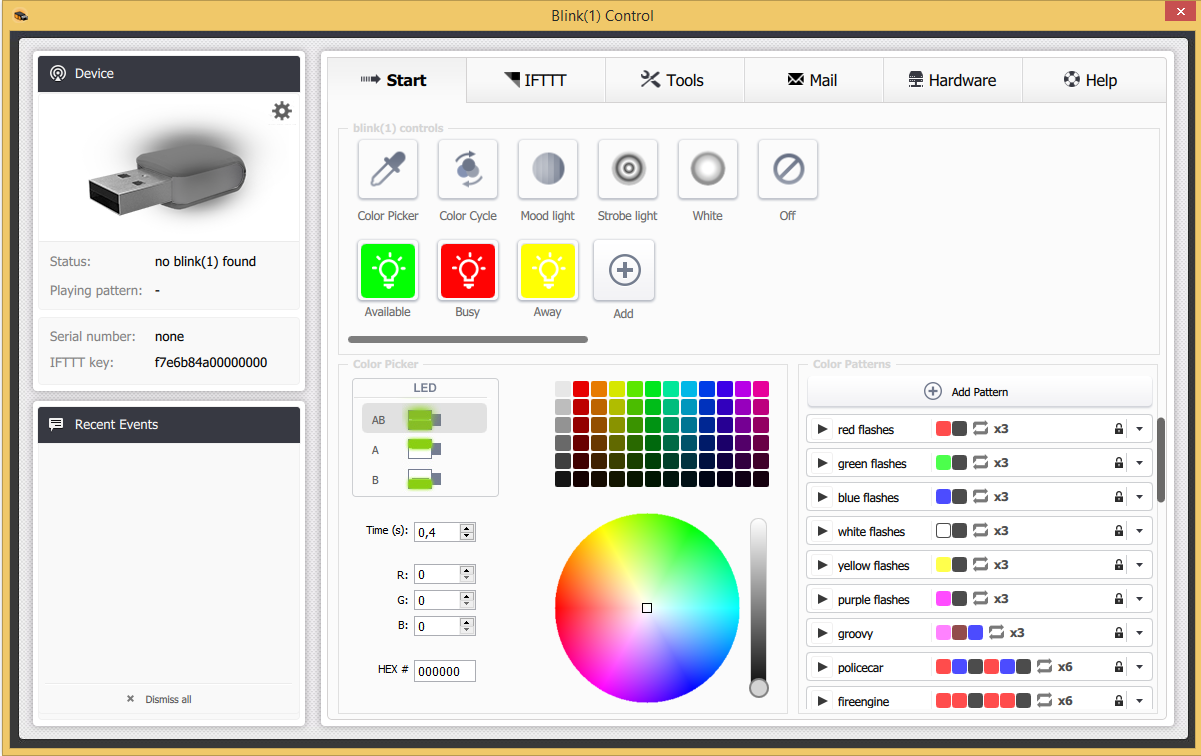
This application offers many possibilities. Quickly we find in the top left the status of the key (here not connected), in the bottom left the events, in the top in the center of the quick actions to control the key, just below an advanced system of choice of modes and colors , and on the right the patterns.
Once there, you have to click on the small notched wheel in device to bring up the advanced configuration menu and activate the server API, putting serverHost on any. Also note the port to report it in the Jeedom configuration.
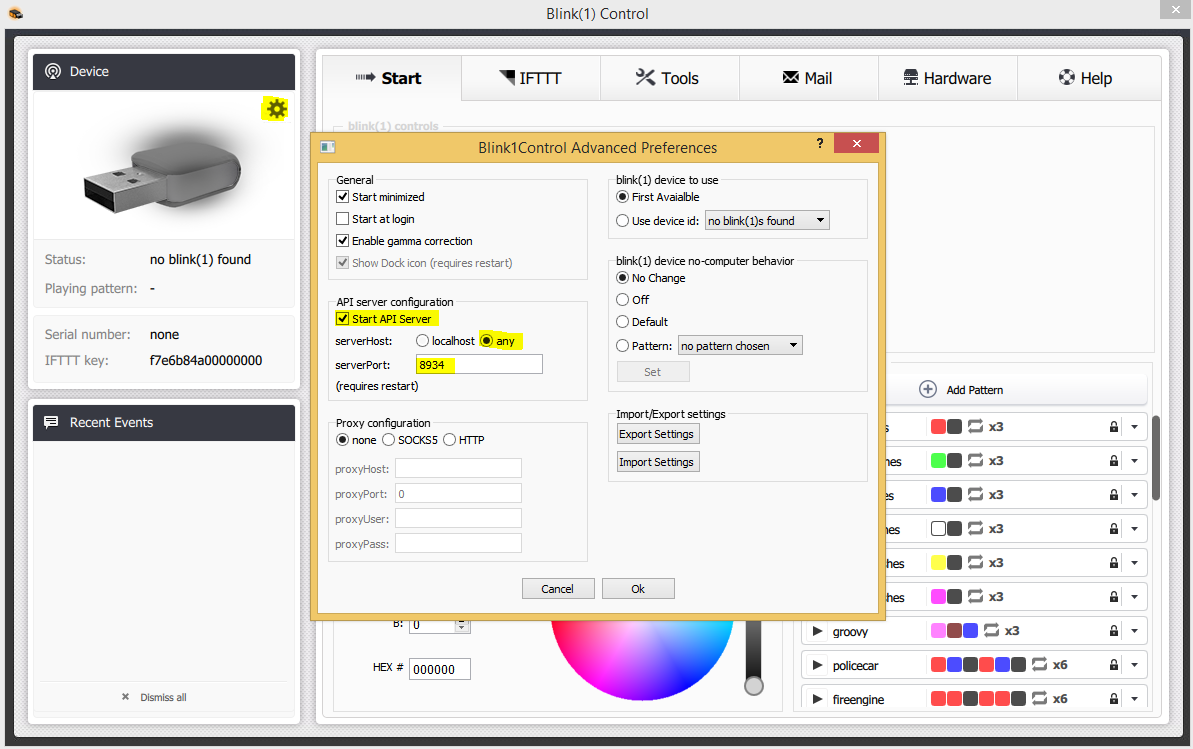
Validate and restart blink1control so that it takes it into account.
“URL monitoring mode”

In this mode it is the blink1control application which calls this URL every X seconds which will give it its instructions.
To configure it, in the blink1control application go to tools then click on the little plus (+) to add one, then make URL and copy the URL given by Jeedom (URL fields to watch) in the path. You can also configure the update frequency.
Important
For this to work it is necessary that the PC on which blink1control is able to access Jeedom. If you are using a laptop outside your network with the key on it, Jeedom must therefore be accessible from the outside. If you don’t know how, the best is to use Jeedom DNS.
In this mode you also have an option “Do not repeat commands” this allows you to no longer repeat the last command once blink1control has taken into account the request. It is advisable to leave it checked.
“Both” mode”

This mode is a combination of the 2 previous modes, the advantage is that it combines the reaction speed of the first and the possibility of operating it even outside the second home. For the configuration it is therefore necessary to follow the procedures for the mode “Calls to the blink API (1)” and the mode “Monitoring by URL”.
SSH mode”

This mode must be used if you have put the blink (1) on a Linux machine other than the one where Jeedom is installed (Jeedom master because the plugin is not compatible in remote mode). The configuration is quite simple :
- Device number : Device ID, to be used only if you have several blink keys (1) on your machine
- Address or IP : IP address of the machine where the key is connected
- Username : the user name to log on to the machine where the key is connected
- Relative path to blink(1)-tool software : relative path to the blink1-tool executable
Tip
The executable is available here, beware Jeedom only works with the linux version which is of course only compatible with a linux type machine (rpi, rpi2, jeedomboard, cubieboard, bananapi…). Just transfer the executable to the machine where the key is plugged in, and make it executable (chmod + x blink1-tool)
Important
For this to work, you must have set up at the SSH level the RSA key exchange so that Jeedom can connect to the machine where the key is connected without providing a password.