Geoloc plugin
Plugin for managing coordinates and calculating distance between 2 points, travel time (by car) between 2 points as well as distance.
Configuration
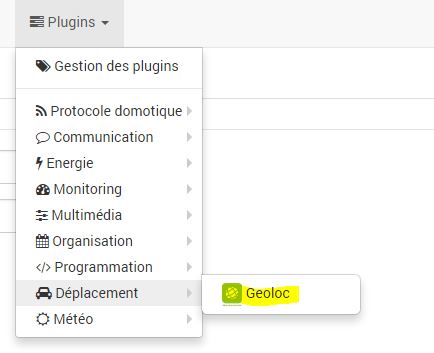
Once the plugin is installed and activated from the Market, you access the page of the Geolocation plugin by :
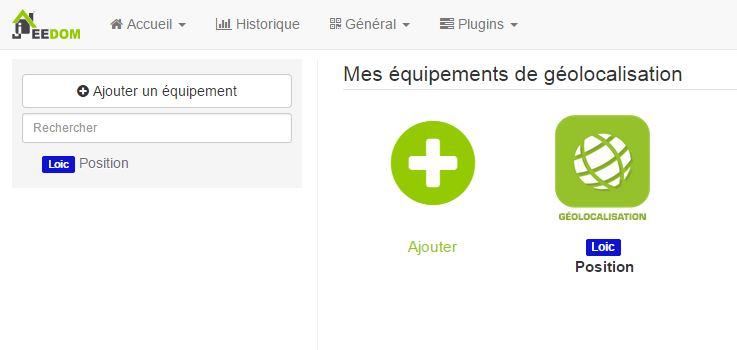
Here you find all your Geoloc equipment :
Tip
As in many places on Jeedom, placing the mouse to the far left brings up a quick access menu (you can from your profile always leave it visible).
Once an equipment is selected you get :
L’onglet « Général » permet de choisir le nom de l’équipement, l’objet parent ainsi que son état et sa visibilité. L’onglet « Commande » permet de rajouter les informations que nous voulons obtenir. Once the equipment has been added, we have the choice between three types of controls : fixed, dynamic and distance.

Fixe
Represents a point with coordinates that do not change. For example the coordinates of your home, your work … You just have to note the coordinates in the form : Longitude latitude.

Pour trouver les coordonnées de votre position fixe, allez simplement sur Google map : https://www.google.com / maps / preview . If you are looking for an address, then the contact details will be in the URL address, for example for 25 rue de Mogador :

You can also left click on the map, and the coordinates will appear in the small map at the top left.

Dynamique
Represents a point with variable coordinates, the object moves. This is usually your laptop. This order will therefore contain the last contact details sent until you send new ones. The URL to update this command is :
\#URL\_JEEDOM\#/core/api/jeeApi.php?api=\#API\_KEY\#&type=geoloc&id=\#ID\_CMD\#&value=%LOC
#URL_JEEDOM# corresponds to your Jeedom access url. This is (unless you are connected to your local network) the internet address that you use to access Jeedom from outside. Do not forget to indicate the port as well as / jeedom /.
api=#API_KEY# corresponds to your API key, specific to your installation. To find it you can either go to the Géoloc plugin, it is indicated directly in the URL.

Soit dans le menu « Général », puis « Administration » et « Setup », en activant le mode Expert vous verrez alors une ligne clé API.

<id=#ID_CMD# corresponds to the ID of your order. Une fois que vous avez donné un nom à votre commande de Géolocalisation, déterminé son type et sauvegardé, un numéro apparaît dans la case « # » devant le nom votre commande.

%LOC corresponds to your coordinates in the form Latitude, Longitude.
You must therefore perform an HTTP POST on this address by replacing% LOC with your contact details.
Android example with Tasker
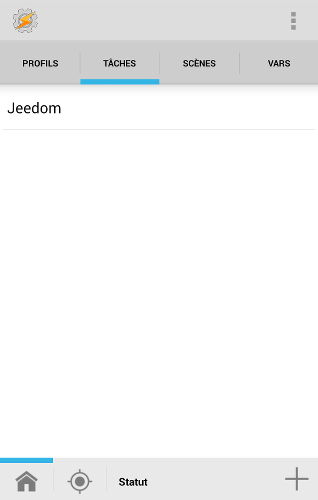
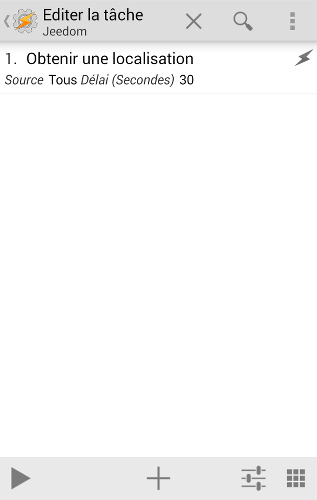
Be careful : for this example you need the Tasker app for Android (https://play.google.com/store/apps/details?id=net.dinglisch.android.taskerm). Dans l’onglet « Tâches », nous rajoutons une nouvelle tâche ici appelée « Jeedom ».
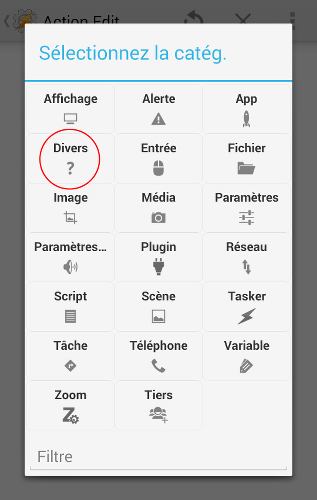
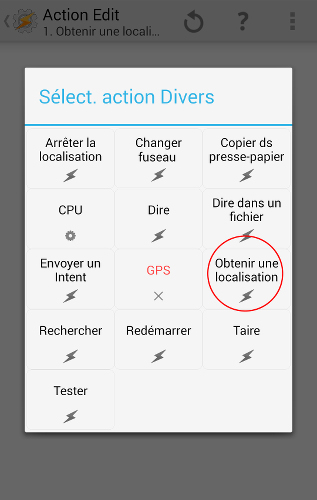
Nous y ajoutons une première action, dans la catégorie « Divers », nous sélectionnons « Obtenir la localisation ».
We will use any source to obtain our position, and we will set a time limit of 30 sec so that Tasker has time to get our contact details.
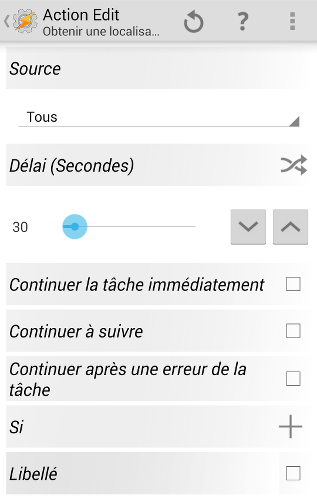
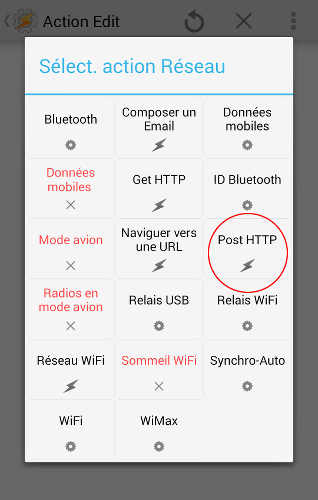
Too short a time frame may not make it possible to obtain contact details or inaccurate contact details. It is the same for the type of source. Nous ajoutons une deuxième action, dans la partie « Réseau » cette fois, nous sélectionnons « Post HTTP ».
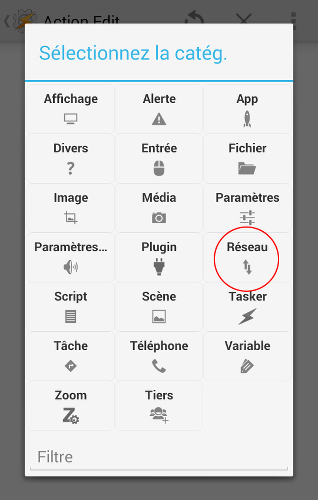
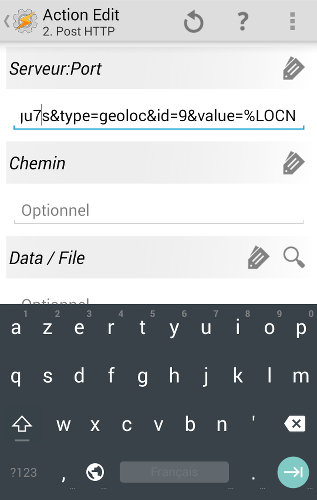
Dans la case « Serveur :Port » nous copions notre URL complétée sauf pour la partie %LOC.
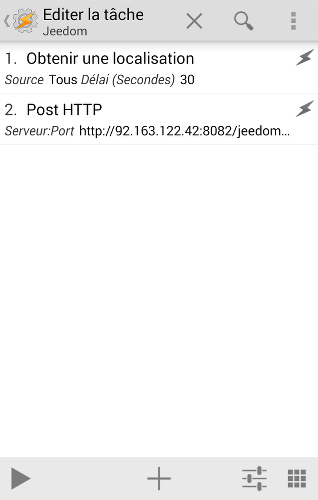
Lorsque nous lançons notre tâche « Jeedom », une icône devrait vous informer de l’utilisation de votre GPS dans votre barre de notification.

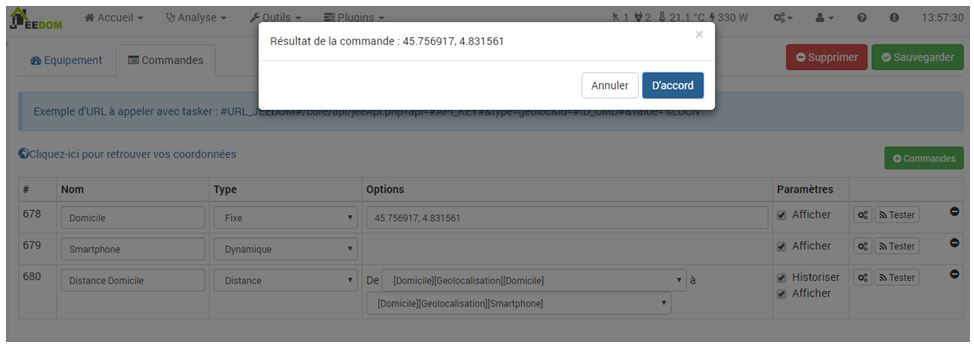
Une fois le délai écoulé, nous cliquons sur « tester » dans Jeedom et les coordonnées de notre portable apparaissent alors dans le popup. Tasker automatically replaced the% LOC variable with your contact details.
Now you just need to create a scenario in Tasker which will launch this task when you need it. For example every hour, when you connect by wifi…
Distance, Travel Time and Travel Distance
Calculates the distance, the journey time (by car, using Google Maps) or the distance of a journey (by car, using Google Maps) between two points. It is therefore necessary to have already filled in at least two commands. Here we have the fixed coordinates of our house as well as the updated coordinates of our mobile. So we can calculate the distance between the two. Nous sélectionnons « Distance » en type et nos deux commandes précédentes dans les options. Once saved, we use the test button and the distance then appears in the popup. Here 1.34 km.
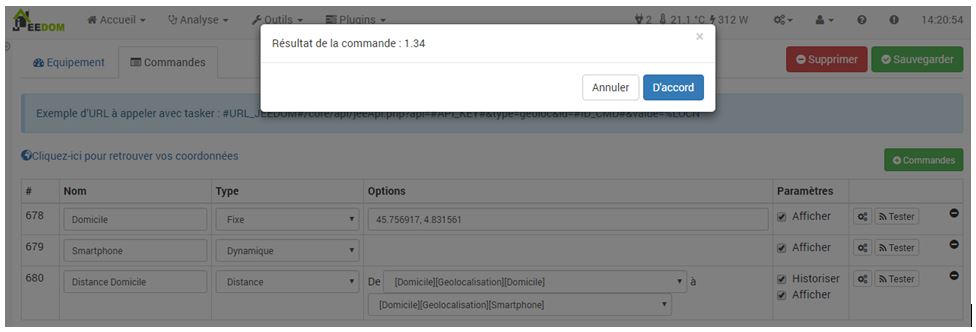
Likewise if you want the journey time or the distance of a journey, it must choose respectively in type : “Travel time “or” Distance path”.
This plugin works like a module, that is to say that once saved we can find it in the list of actions or commands, it is thus very simple to use it when creating scenarios for example. We can for example carry out a scenario which is based on the distance between our laptop and the house for example.
Example scenario
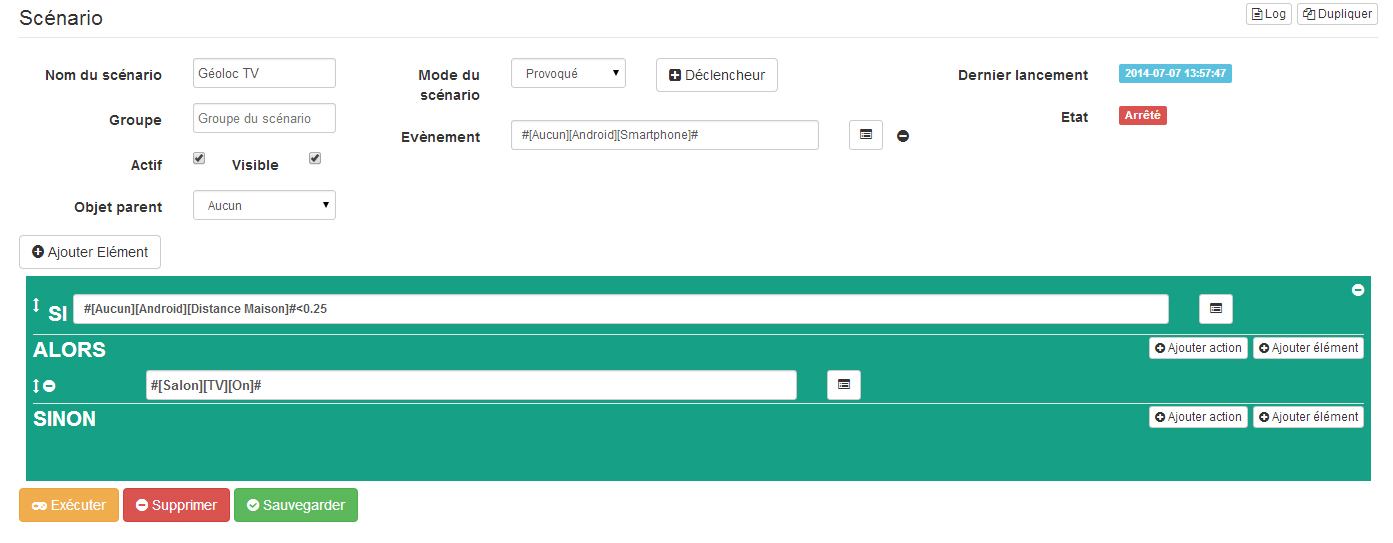
Dans la partie « Scénario », nous créons un scénario nommé « Géoloc TV » qui nous permet d’allumer la TV quand nous sommes à moins de 250 m de notre maison. Be careful : positioning systems are not precise to the nearest meter, remember to take a margin when creating your scenarios. Dans « Mode de scénario » nous choisissons « Provoqué » et en « Déclencheur » nous ajoutons notre portable. Indeed, it is when the coordinates of our mobile are going to be updated that we will trigger the scenario.

Nous ajoutons un élément « Si / Alors / Sinon » avec comme condition une distance inférieure à 250 m et comme action la mise sous tension de la TV.
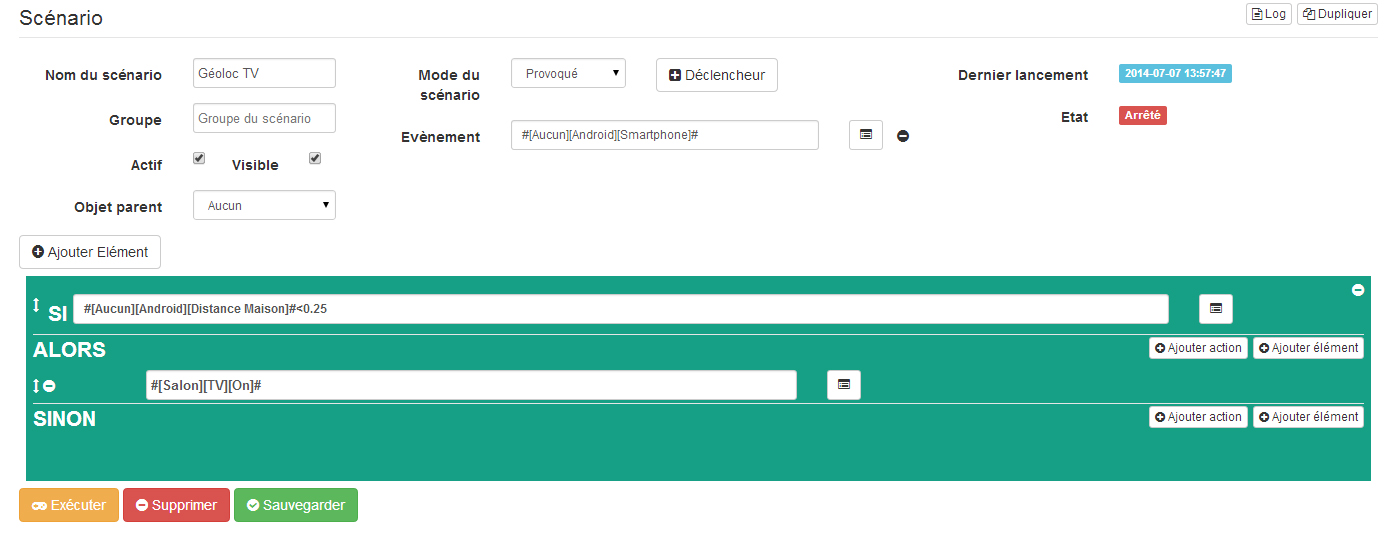
Nous n’avons rien mis dans la partie « Sinon » ainsi il ne se passera rien si je suis à plus de 250 m. Once saved, we can look at the log. We see here that Jeedom has tested the distance between the laptop and the house and since the latter is more than 250 m, then nothing happened.

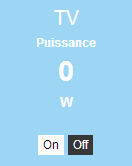
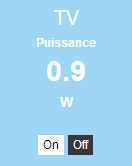
For our test we check that the TV is off, the widget shows us 0 watt consumption.
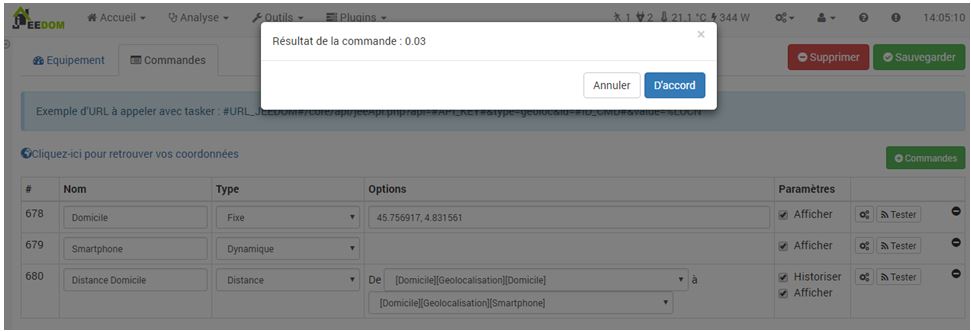
We get closer to our house and we start the task on Tasker. We can see by testing the distance that it is 0.03 km now. So we are well under 250 m.
The scenario part informs us that it has been launched recently.
A tour in the log allows us to see that it was launched after updating the mobile phone’s coordinates, and that the distance was much less than 0.25 km.

The TV plugin on the home screen shows that it is now powered.
Here is an example of using the Geolocation plugin.
Of course we did the HTTP POST from an Android smartphone but it is quite conceivable that a tablet can do the same thing (with the internet) or even a laptop with a script to retrieve and send its details.
