Script plugin
Plugin allowing to execute scripts (shell, php, ruby…), http requests, to retrieve information in XML or JSON.
Plugin configuration
The configuration is very simple, after downloading the plugin, you just need to activate it and that’s it.
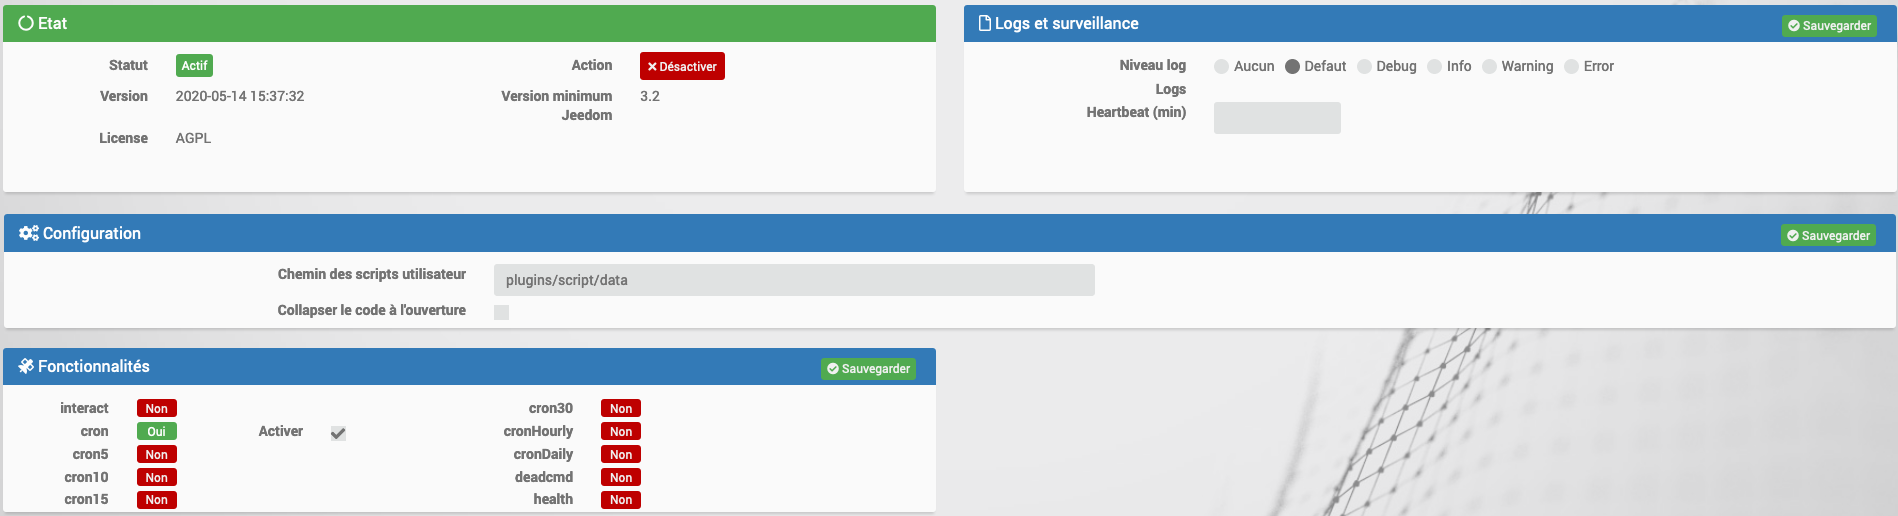
The only option is where jeedom puts the scripts by default, it is advised not to touch them.
Equipment configuration
The configuration of Script equipment is accessible from the plugin / Programming menu
This is what the Script plugin page looks like (here already with equipment) :
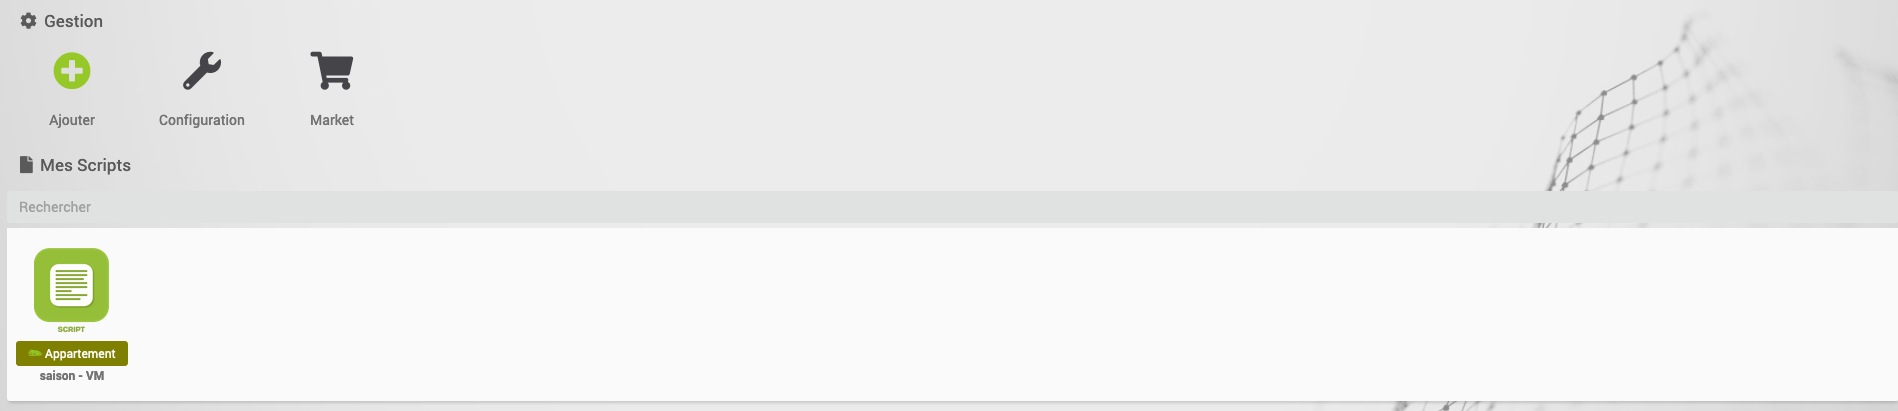
Here is the list of your Scripts. Once you click on a piece of equipment you get :

Here you find all the configuration of your equipment :
- Script equipment name : name of your script equipment
- Category : equipment categories (it can belong to several categories)
- Activate : makes your equipment active
- Visible : makes it visible on the dashboard
- Parent object : indicates the parent object to which the equipment belongs
- Self-actualization : allows to specify an automatic update cron for all info type commands.
- Delay before updating the information following an action : Enter number of seconds
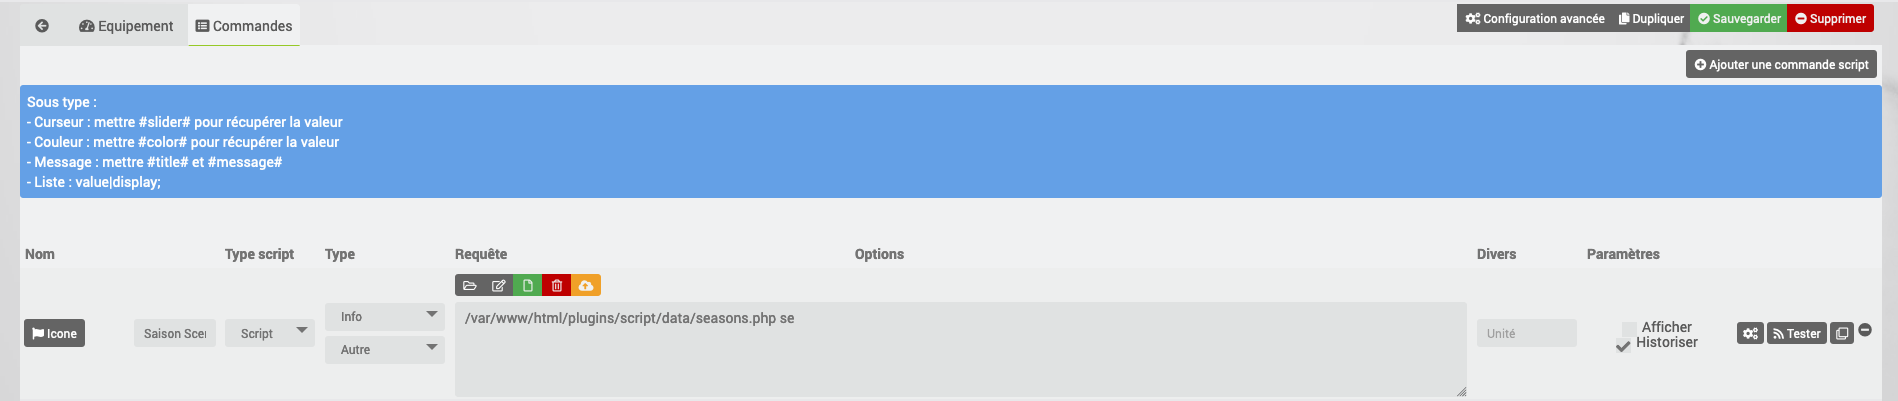 Here you find the list of orders :
- Name : This field contains the name you want to give to your order / information.
- Icon : This field allows you to associate an icon with your name (in this case Jeedom replaces the name with the icon in the Dashboard).
- Script type :
- The type HTTP : allows sending a request to an external device without necessarily waiting for a return of this command. The example that will serve as support for the http type will be the configuration of a request to a Vera to turn on a light.
- The type script : mainly used to run internal Jeedom scripts. The example which will serve as support for the script type will be the configuration of the temperature monitoring script of the raspberry.
- The type XML : allows to retrieve information encoded in XML from a remote device. The example that will serve as support for the XML type will be the configuration of the script to query an Eco-Device.
- The type JSON : allows to retrieve information encoded in JSON from a remote device. The example that will serve as support for the JSON type will be the configuration of the script to query Sickbeard (or XBMC).
- the type and the Sub-type
- Field Request
-
This field must contain the query itself, or the script path if the “type of script” field is script. The “browse” button” : allows you to select the file contained in the Jeedom internal folder.
> This file is accessible in SSH in ``/var/www/html/plugins/script/data/``. FYI, the SSH command to assign rights ``www-data`` to a file is : ``sudo chown www-data:www-data NOMDUSCRIPT.EXTENSION``. Note that to execute a script, it must have www-data rights. - The button Edit : allows you to edit using an internal code editor one of the files contained in the directory allowing access to the file code.
-
The button New : allows to create a command file.
> Do not forget to enter the name of the file and its full extension, otherwise your superb script will not work. Without extension Jeedom will not be able to recognize the language associated with your file. CF : Generality - The button Delete : allows to delete a command file.
-
- Field Options : Field with variable options depending on the choice of script type.
- Unit : data unit (can be empty).
- min / max : data bounds (may be empty).
- Historize : allows to historize the data.
- Pin up : allows to display the data on the dashboard.
Important
Special characters should be avoided in the script path or in its parameters as much as possible. The allowed characters being : numbers, letters (upper or lower case)
Important
You can in the request field (for http, json, xml) put json, you just have to precede it with
json::, examplejson::{"clef":"valeur"}

Used to call a url or retrieve the return of a URL.
- a checkbox “Do not check SSL” : if checked, allows Jeedom not to send the “User” and “Password” fields when requested. Jeedom will not seek to identify itself to the remote site / machine.
- a checkbox “Allow blank response” : if checked, allows Jeedom to not wait for a response, or to ignore any response to the transmitted frame. In general, we check if Jeedom returns a “Curl error” : Empty reply from server”.
- a check box “Never report errors” : allows not raising an alert in case of error.
- a timeout field” : without being entered, the timeout of the request is by default 2 seconds, otherwise it is worth the entered value.
- a field “Maximum trials” : Maximum 4 tests by default.
- a “User” field” : to enter a username.
- a “Password” field” : to enter a password.
The HTML choice

Allows you to pass a web page (HTML file) to retrieve a value above. The syntax is the same as for jquery.
The option field has a “HTML file URL” field” : this field therefore contains the link to the machine hosting the HTML file in question.
The XML choice

Allows you to recover xml and specifically look for a value in it.
The option field has a “URL of the XML file” field” : this field therefore contains the link to the machine hosting the XML file in question.
Important
Only values can be retrieved, attributes cannot be retrieved.
The JSON choice

Allows to recover json and to specifically look for a value in it.
The option field has a “JSON file URL” field” : this field therefore contains the link to the machine hosting the JSON file in question.
Exemples
HTTP : Piloting a Vera
The example is based on a Vera and consists of driving a dimmable bulb. I’m not going to dwell on how to control a Vera by http request, the TLD forum is full of answers. In addition, the example corresponds to my type of material and will have to be adapted to yours.
Tip
A method for those who grope for writing http requests, first validate the syntax in your browser and only then go to the configuration under Jeedom. When an Action script does not work, switching to the Info / Other script allows you to see the error returned.
Let's go :
- We create equipment : for example LUM KITCHEN (I think we all have a kitchen on hand)
- We associate it with a parent object : for example VERA, it allows me to centralize all orders related to VERA on a single parent.
- Choose your category.
- Activate your equipment, do not check visible, we will see a little later how to associate it with a virtual one (sexier, more WAF)
- For self-updating, do not put anything, it is an impulse command linked to a press of a button or a scenario !
- Add a script command
- Remember to save
Explanations :
- Name : 100% because we will turn on a light at full power
- Script type : http
- Type : Action (this is a command)
- Sub type : Default
- Request :
''url
http://<IP_VERA>:3480/data_request?id=lu_action&output_format=json&DeviceNum=12&serviceId=urn:upnp-org:serviceId:Dimming1&action=SetLoadLevelTarget&newLoadlevelTarget=100
‘’
Tip
the “100” at the end of the request corresponds to the percentage of power to be assigned so putting “0” at the end of the request corresponds to switching off the bulb.
The “test” button allows you to test your order !
You can therefore multiply orders in the same equipment, for example by placing an order at 60% for dim light, creating a third at 30% for night trips to be combined in a scenario, etc
It is also possible to create a slider type command by putting the tag #slider# in the query :
''url
http://<IP_VERA>:3480/data_request?id=lu_action&output_format=json&DeviceNum=12&serviceId=urn:upnp-org:serviceId:Dimming1&action=SetLoadLevelTarget&newLoadlevelTarget=#slider#
‘’
Tip
If your command is of type message you can use the tags
#message#and#title#, same for a color type command with the tag#color#, or slider type with#slider#or list with#select#
HTTP : Send notification to XBMC
Goal : Send a notification to XBMC when opening a front door.
- Name : PUSH XBMC
- Script type : http
- Type : Action (this is a command)
- Sub-type : Default
- Request :
''url
http://IP_DE_XBMC:8080/jsonrpc?request={ %22jsonrpc%22:%222.0%22,%22method%22:%22GUI.ShowNotification%22,%22params%22:{ %22title%22:%22Mouvement% 20Détecté%22,%22message%22:%22Porte% 20Entrée%22},%22id%22:1}
‘’
It's up to you to test this in a scenario for example !
XBMC API here (only the fields marked “required” are mandatory)
Goal : Send a notification to XBMC when the temperature drops below a certain threshold
Take the example above :
- replace
Movement%20DetectedbyRisk%20of%20freeze - replace
Door%20EntrywithTemperature%20exterior%20:% 20#[EXTERIEUR][EXTERIEUR][TEMPERATURE]#
Test on a scenario #[EXTERIEUR][EXTERIEUR][TEMPERATURE]# < 5 par exemple
Action : Launch the script, via virtual equipment, linked to your script !
SCRIPT
The nicest but not the easiest to explain.
Prerequisites : know how to develop a script in php, python, perl or ruby.
Important
The extension of your script must absolutely match its type. Indeed Jeedom is based on the extension of the script for the executable to launch
If your file name does not contain :
- .php .py .pl .rb
The script plugin will launch a shell which will execute it based on the directive of the 1st line (shebang ). Example :
''bash
#!/ bin / csh -f
#!/ bin / ksh
#!/ usr / bin / env python3
#!/ usr / bin / env php
#!/ usr / bin / env node
Etc. ...
‘’
The Raspberry temperature monitoring script will serve as an example for using the script type : Script
After downloading the script, the “Browse” button allows you to select the temp_rasp.php file.
Out of curiosity, you can go and see the contents of the file by pressing the “Edit” button, you should get the following code :
This is a php script that can be reused outside Jeedom !
''php
<?php
$temp = shell_exec("cat /sys/class/thermal/thermal_zone0/temp");
$temp = $temp / 1000;
$temp = round($temp,1);
echo $temp;
?>
‘’
NOTE : concretely, it is the php “echo” function which will give the value to Jeedom
The settings
Get Jeedom’s info to use it in a script. Recovery depends on the type of script used :
- In the line :
/var/www/html/plugins/script/data/my_script.php my_value, the argumentmy_valueest une chaîne de caractères (fixe) récupérée dans le script php dans le tableau d’arguments$argvvoir https://www.php.net/manual/fr/reserved.variables.argv.php for more details. - We saw previously that it was possible to retrieve dynamic values from Jeedom.
-
In the line :
/var/www/html/plugins/script/data/radio.py VOL #slider#, the argument#slider#is retrieved this way$argv[2]. When the script is executed by Jeedom, it will automatically replace#slider#by the (numeric) value of the slider. see Google for details on retrieving parameters in Python. - Stronger : Potentially, all the variables accessible by Jeedom can be used by the script plugin :
- You want to recover the value of the kitchen temperature to store it outside of Jeedom ?
- Skip
#[MAISON][CUISINE][Température]#as a parameter to the script and Jeedom will replace it with the value read when sending.
Recommendation to test the parameters in the php script :
''php
if (isset($argv)) {
    foreach ($argv as $arg) {
        $argList = explode('=', $arg);
        if (isset($argList[0]) && isset($argList[1])) {
            $_GET[$argList[0]] = $argList[1];
        }
    }
}
‘’
XSingle ML
Here is the format of the standard XML :
`` ‘‘xml
`` ‘’
If you want the value of led0 in query you put led0. Si vous voulez la valeur de la led1 qui est le fils de leds vous mettez leds > led1.
Notez que l’élément racine <root> n’est pas à préciser dans le champ Request.
XComplex ML
`` ‘‘xml
`` ‘’
The syntax is :
leds > 1 > led1 which gives tata in response, 1 being the row number of the array !
XMore complex ML
`` ‘‘xml
`` ‘’
To retrieve information from the Wert field of the 1st block:
MesPar>0>Wert>0 which therefore returns “268.56 “
To return the next element in the Wert “structure”, you just have to indicate the order number in the structure. Which gives for the element <Wert Typ="delta24"> 0.051</Wert> the following code :
MesPar>1>Wert>2
To move to the next “MyPar” block, you must therefore change the index accordingly : the 1 by 2, for example.
Be careful : If the order changes in the XML file, the request no longer works. It will be necessary to readjust the request according to the returned order.
JSON
Like the XML type, it is possible to read information from a JSON return.
To explain, I am going to base myself on JSON information with the Sickbeard application (bouh… cpasbien) but here only the technique is prime, not the tool!
Access to this file is possible using the following URL :
http://<IP_DELAMACHINEQUIEBERGESICKBEARD>:8083/api/XXXX/?cmd=history&limit=3
NOTE : XXXX is the API key number specific to each SICKBEARD.
First of all, before launching into the configuration of the JSON script plugin, it is a question of correctly identifying the infos to recover., because here we are going to integrate a notion of array in the returns.
Validate the display of information from your browser (test in Chrome).
Example of return :
''json
{
    "data": [
        {
            "date": "2014-09-10 01:37",
            "episode": 4,
            "provider": "RNT",
            "quality": "SD-TV",
            "resource": "XXX",
            "resource_path": "XXXX",
            "season": 2,
            "show_name": "Totovaalaplage S2E4",
            "status": "Downloaded",
            "tvdbid": XXXXX
        },
        {
            "date": "2014-09-10 01:36",
            "episode": 3,
            "provider": "RNT",
            "quality": "SD-TV",
            "resource": "XXXX",
            "resource_path": "XXX",
            "season": 2,
            "show_name": "Totovaalaplage S2E3",
            "status": "Downloaded",
            "tvdbid": XXXXX
        },
        {
            "date": "2014-09-10 01:21",
            "episode": 1,
            "provider": "Cpasbien",
            "quality": "SD-TV",
            "resource": "XXXX",
            "resource_path": "XXXX",
            "season": 1,
HERE --> "show_name": "Totovaplusauski but Totovaalaplage S1E1",
            "status": "Snatched",
            "tvdbid": XXXX
        }
    ],
    "message": "",
    "result": "success"
}
‘’
In the hypothesis where we would like to return the show_name of the 3rd element in php (marked HERE), we would have to do : data> 2> show_name, the return array index starting at Zero.
In this example, the “Test” button will return “Totovaplusauski but Totovaalaplage S1E1”.
Clarifications :
Note the syntax of the Query command, it is of type element0> array index> element1
Disadvantages :
- this method only allows to recover one element at a time.
- If you want to return all the values of “show_name”, this is unfortunately not possible, you will have to duplicate the script as many times as necessary.
HTML
Here we will try to retrieve the last FML.
First you need to configure the url :
http://www.viedemerde.fr
Then you have to find the “path” of the last FML. To do this, go to the site then right click on the desired item then inspect the item, you get :
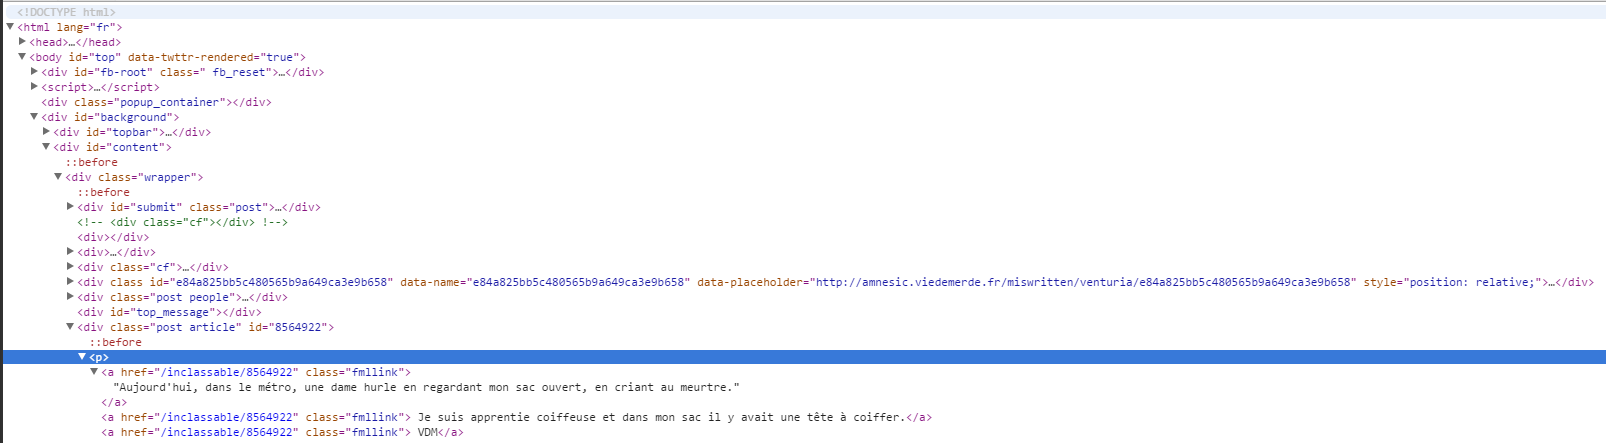
This is the most complex part and requires a little analysis. Here my text is in an “a” tag which is in a p type element which is a class div “post article”. So I have to select the first div element of class “post” and “article” then the first element p and I get everything in the “a” tags it contains. So I have : “div.post.article:first p:first a”.
So we get :

For an update in real time, it is possible to put an update cron.
Tip
When installing an update cron, Jeedom will automatically check the Event box, this is completely normal.
Here then you can imagine a scenario which sends you by SMS the last FML.